Table of Contents
Excerpt
Are you using Roam Research for public blogging, but frustrated that you can't show your Roam blog at yoursite.com, instead of roamresearch.com?
STATUS
UPDATE
Slug
put-your-public-roam-research-at-your-own-domain-for-free
Are you using Roam Research for public blogging, but frustrated that you can't show your Roam blog at
yoursite.com, instead of roamresearch.com?This guide will show you how to do exactly that, at no cost to you whatsoever, using one of the internet's most powerful tools for domain management.
Here's an example of what you'll end up with:
Requirements for this guide:
- A public Roam Research graph
- The URL of the page you'd like your readers to go to
- A domain that you already own, at a domain manager (e.g. Namecheap, GoDaddy) which you have access to
You have two options
Option 1: The hosted option with Cloakist
If you are looking for the fasted way to host your Roam Research then Cloakist is the way to go.
With Cloakist you can:
- Host at your own custom domain
- Change social sharing images and favicon
- Add live chat
- Add any custom CSS/JS that you need
Option 2: The DIY option
Step 1: Move your domain to Cloudflare
The first thing we need to do is take your domain and move it over to being managed by Cloudflare.
Cloudflare is the biggest internet service you've probably never heard of. They sit between you (a website viewer) and around 16 million websites including huge tech companies, who use them to make sure that they can't get attacked by large amounts of malicious traffic.
We don't care about that too much – we're more interested in the fact that they have an awesome tool called Workers (we'll get to that later) which you can use on their extremely generous free tier to put your Roam blog at your domain.
So...
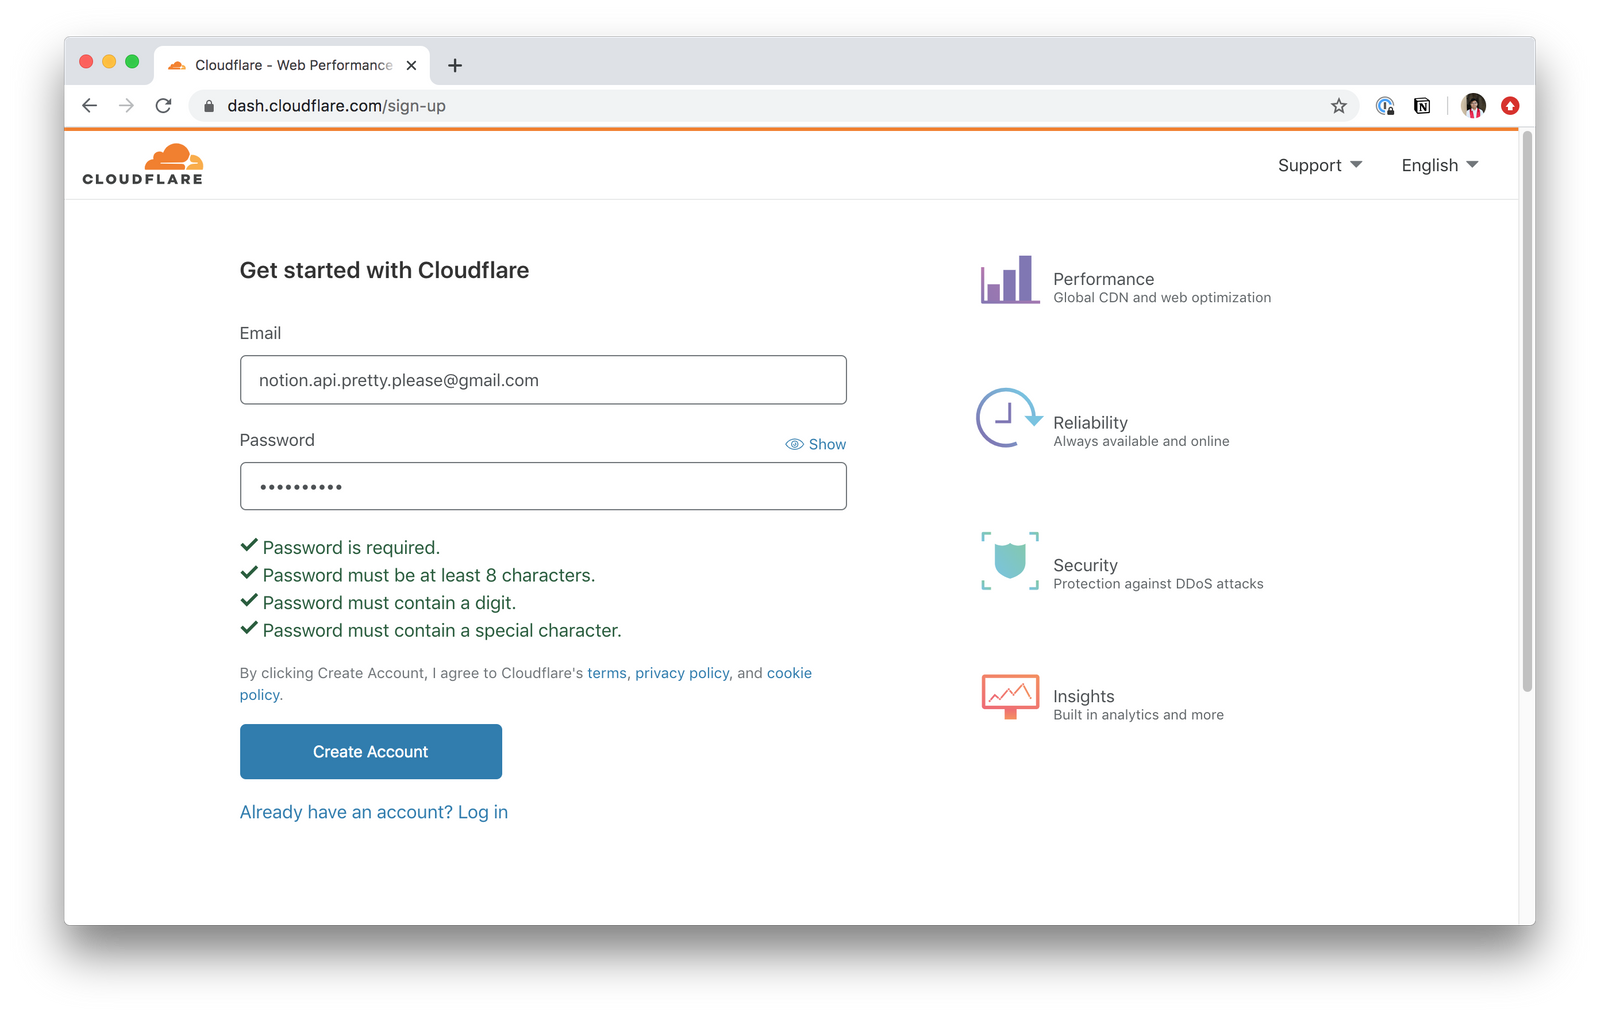
Sign up for an account: https://dash.cloudflare.com/sign-up
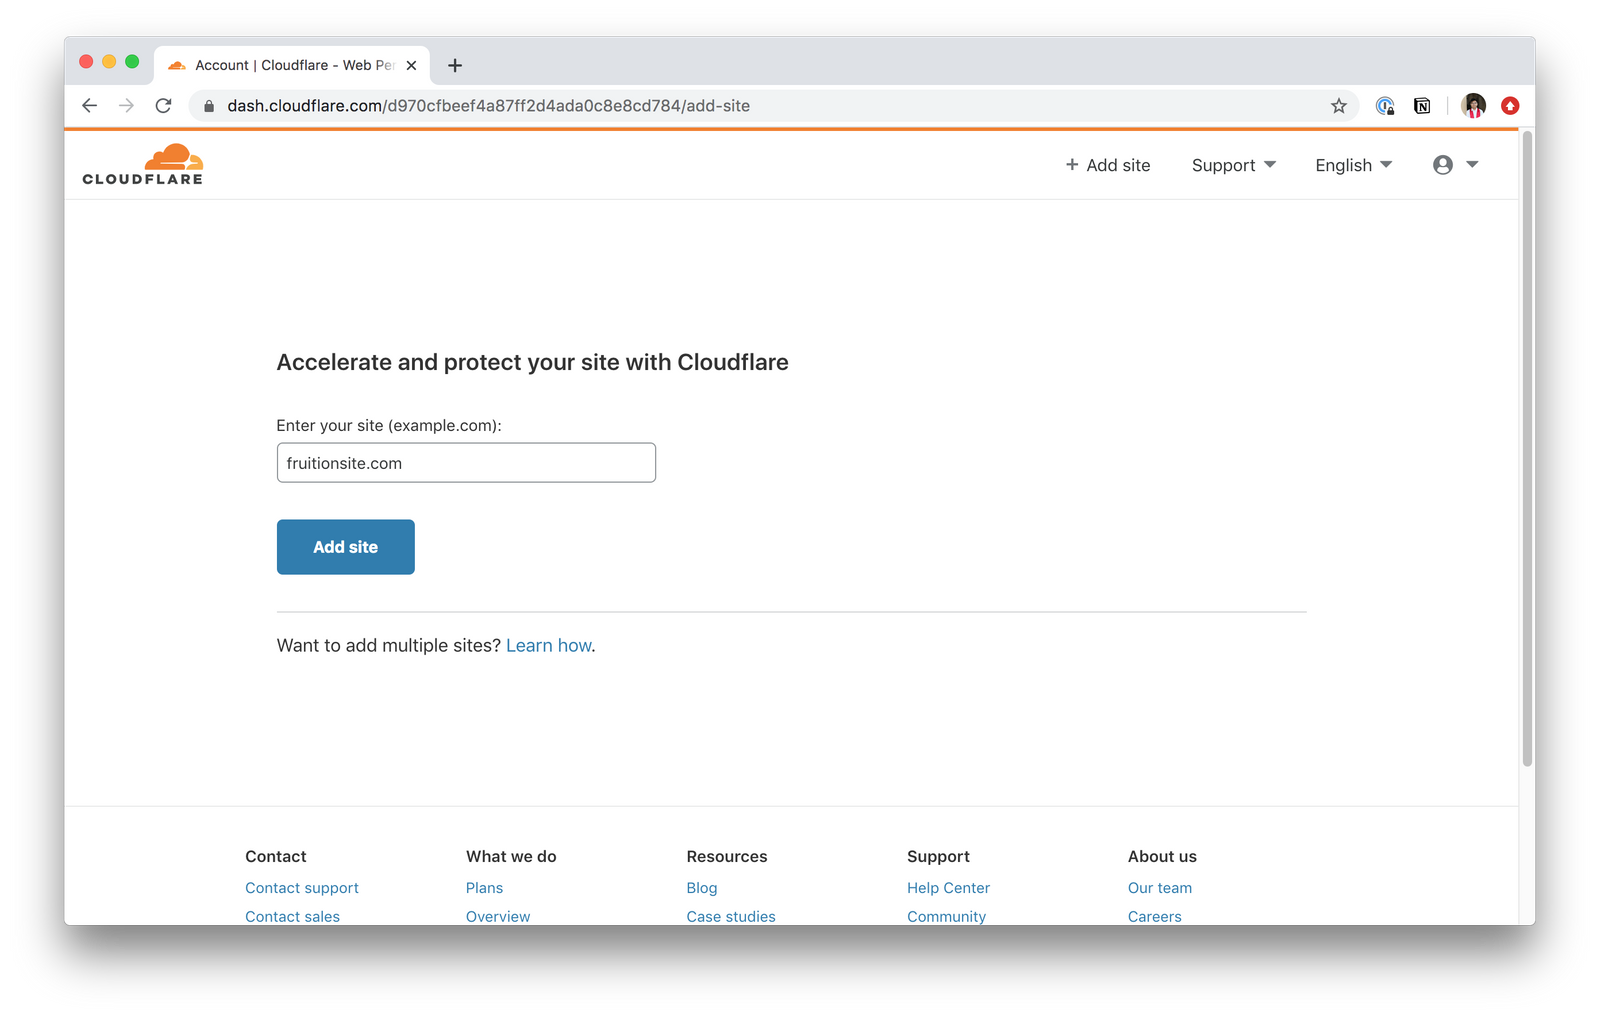
- Enter your domain name. If you would like to use a subdomain (e.g.
subdomain.yoursite.com) with Cloakist, you should still put your root domain name here.
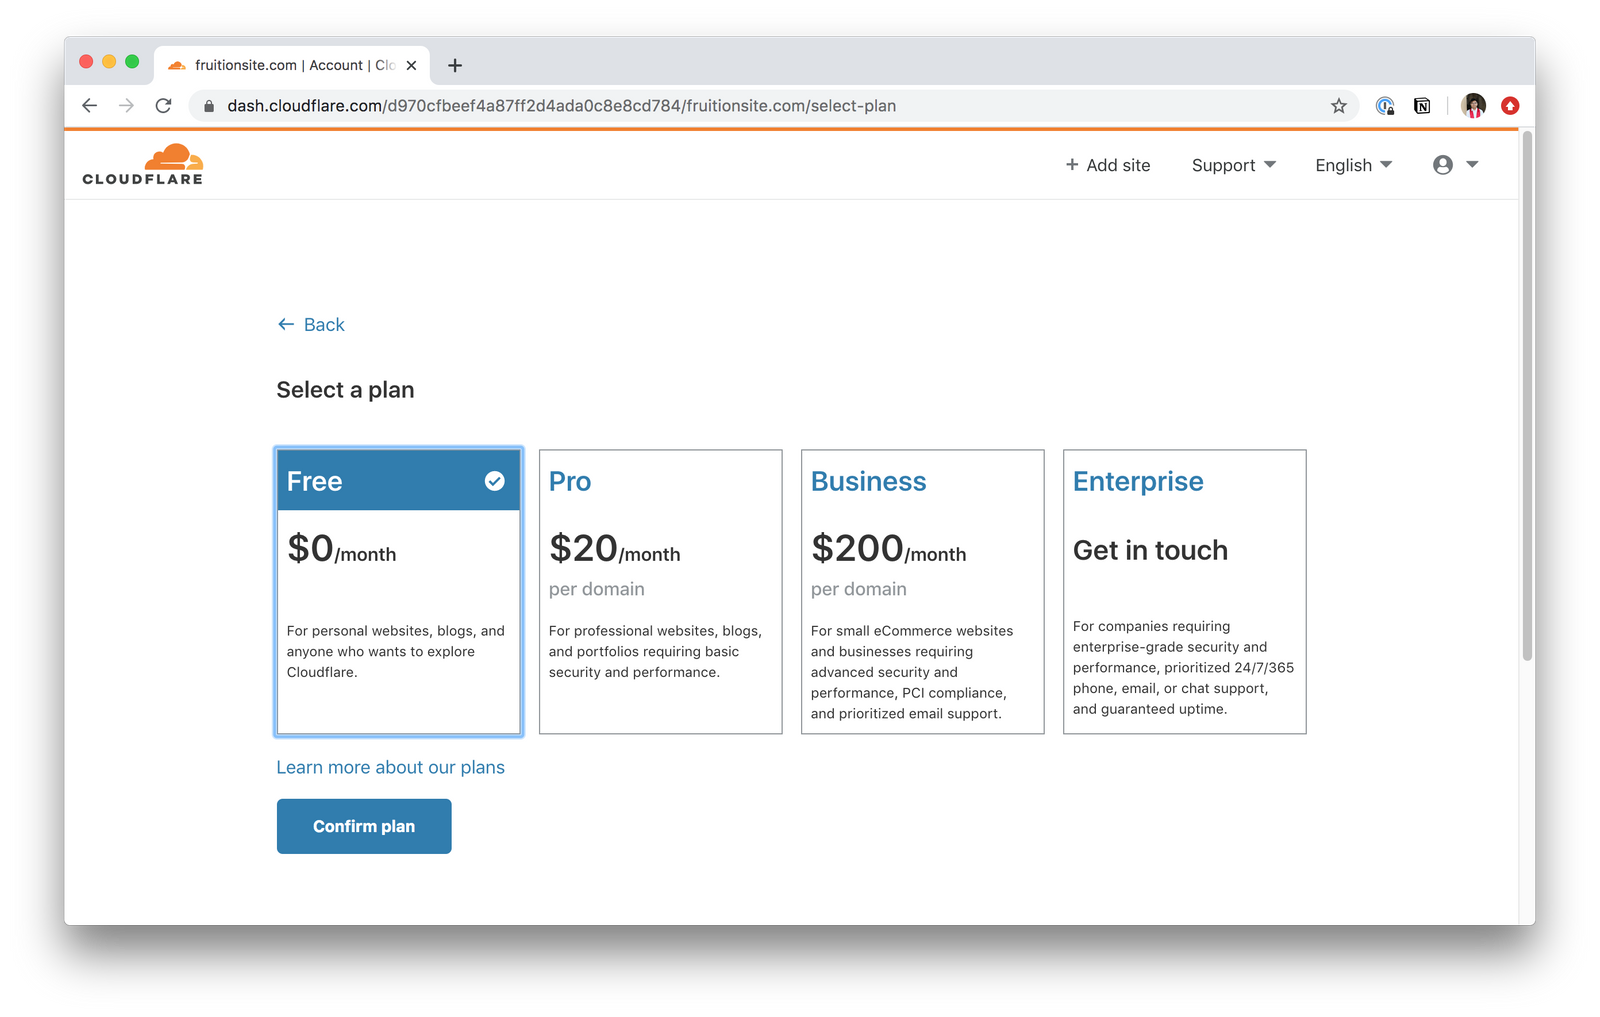
- Select the Free plan
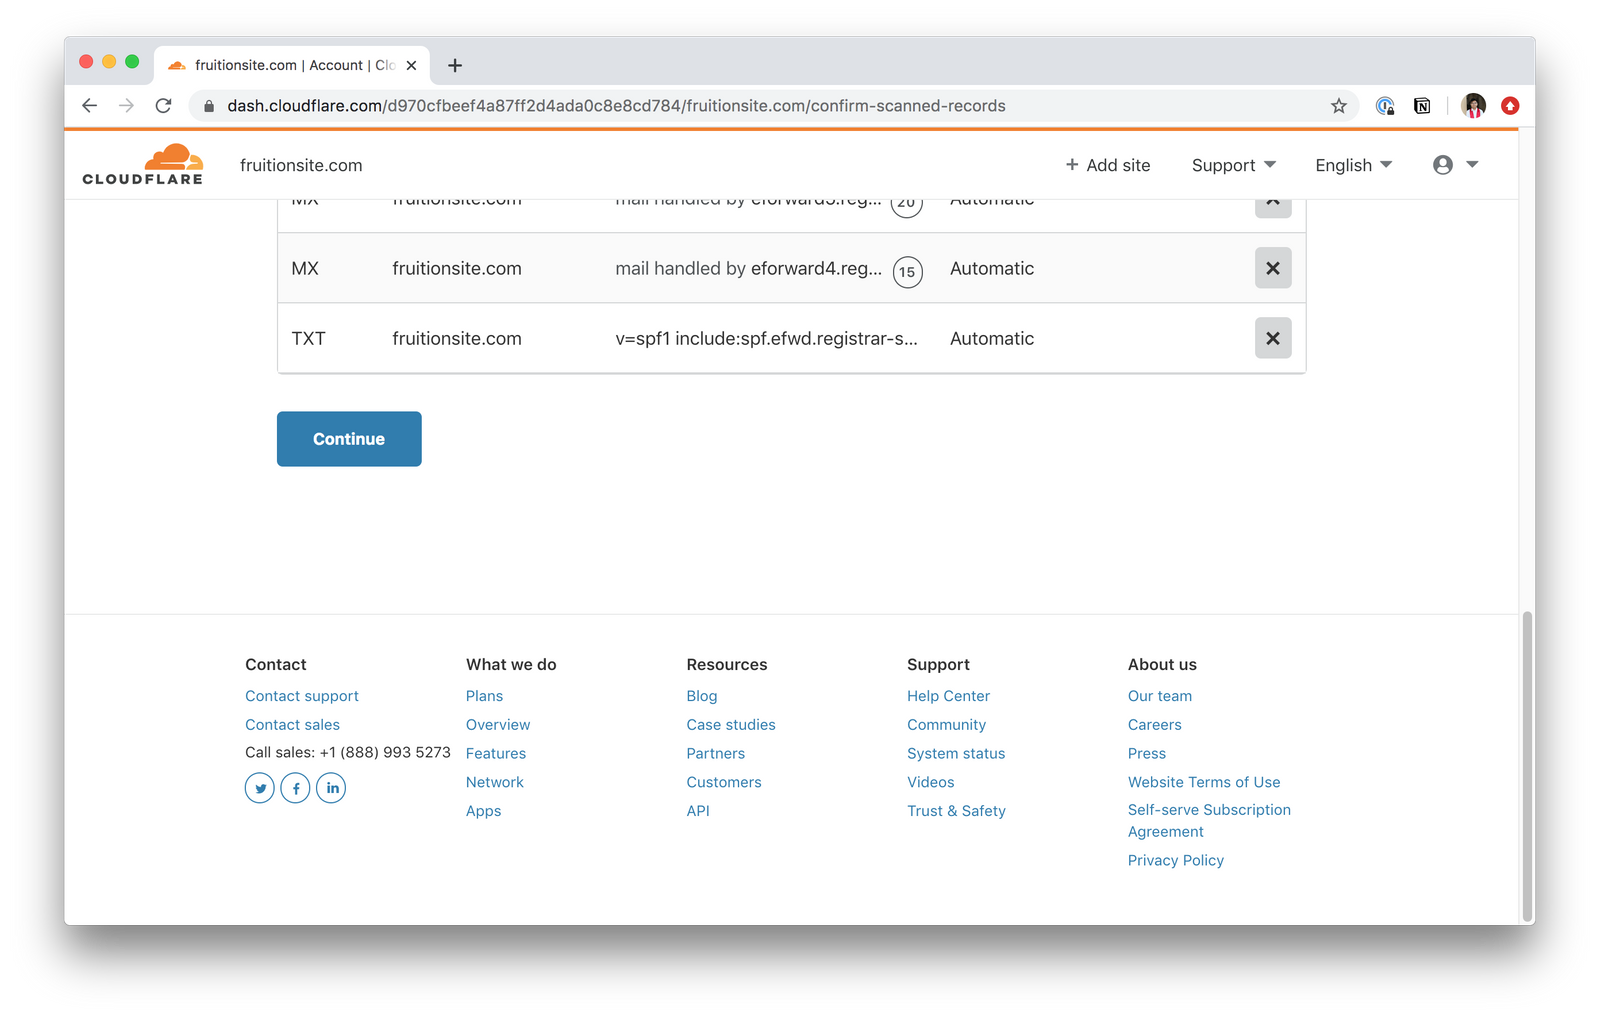
- If you don't have any A records imported, add one with your root domain (
yoursite.com) as the Name and1.1.1.1as the Content. Do the same for any subdomain you want to use (e.g. to use roam.yoursite.com, enter Name:roam, Content,1.1.1.1) Otherwise, click Continue on the DNS Record page.
- Copy the 2 nameservers, which end with
.ns.cloudflare.com
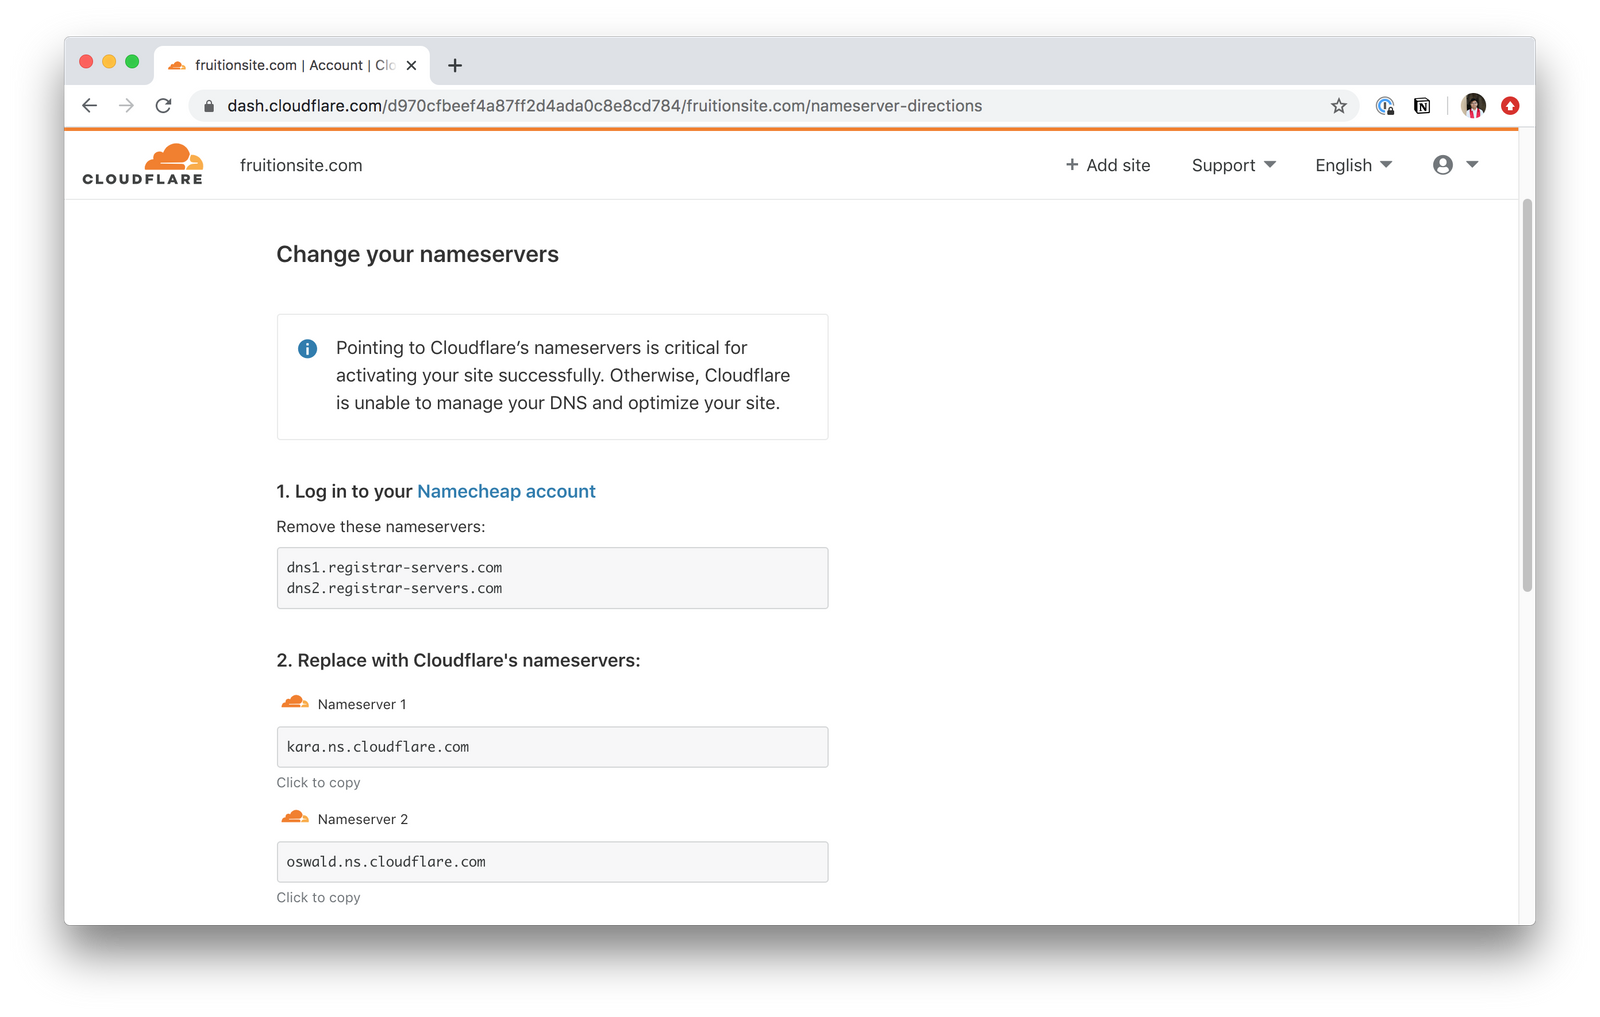
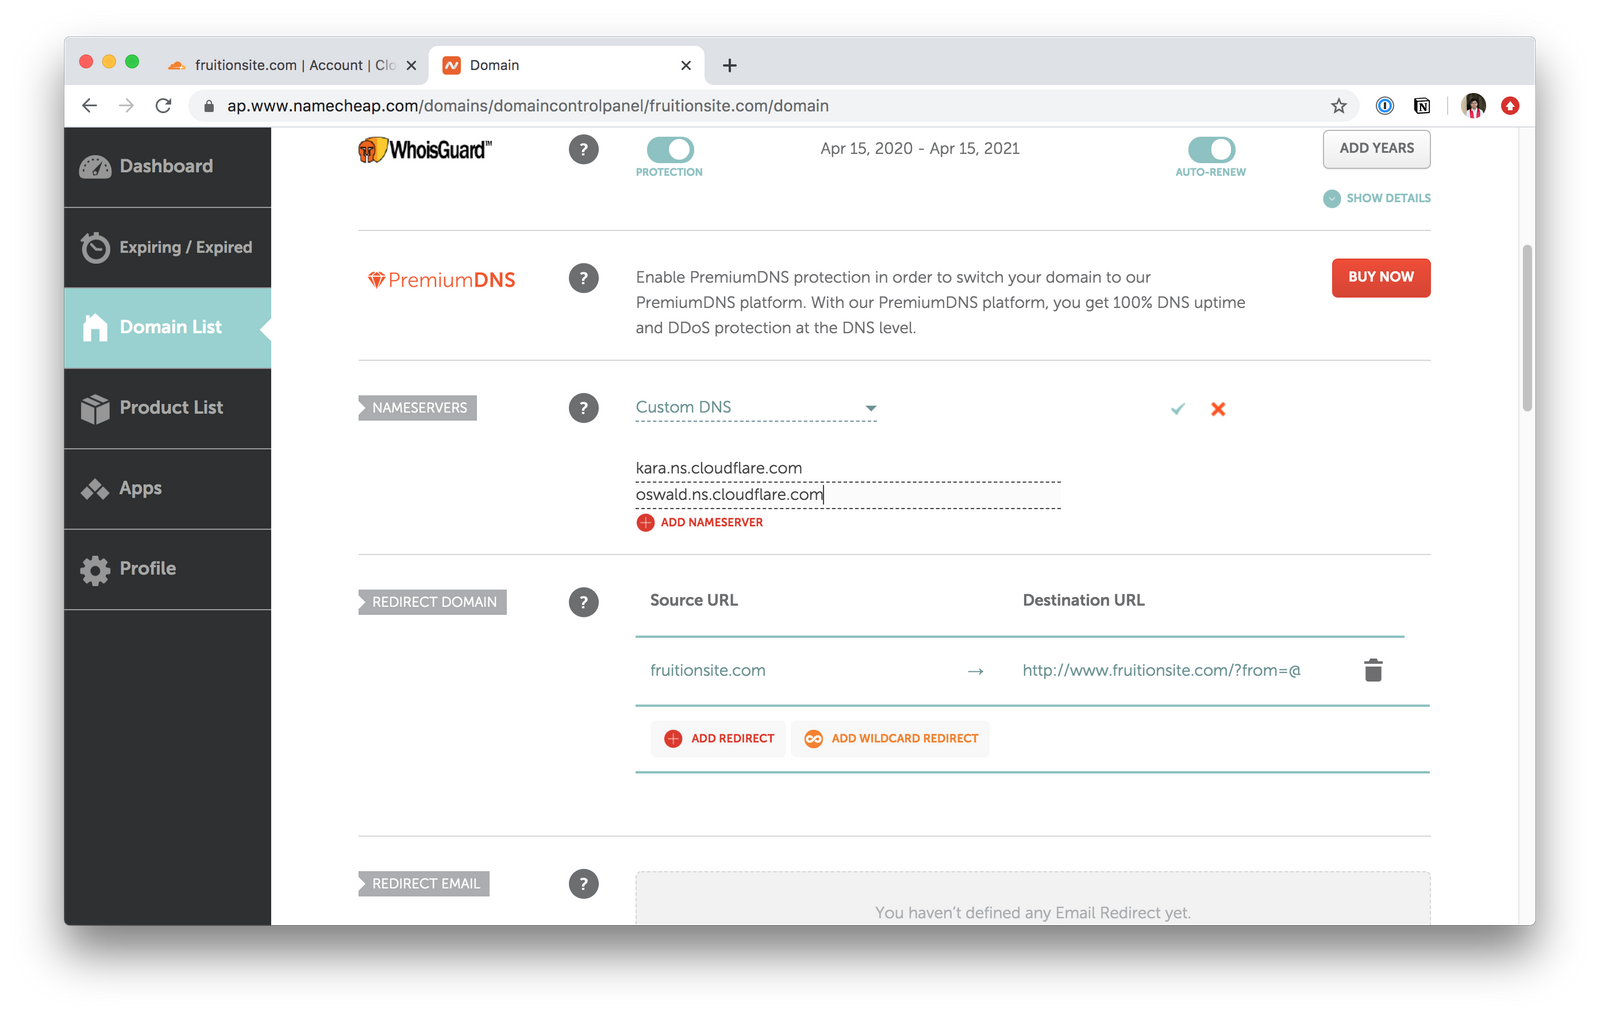
- Paste the nameservers in the domain setting page at your domain manager (Namecheap in my case). Make sure you save the setting.
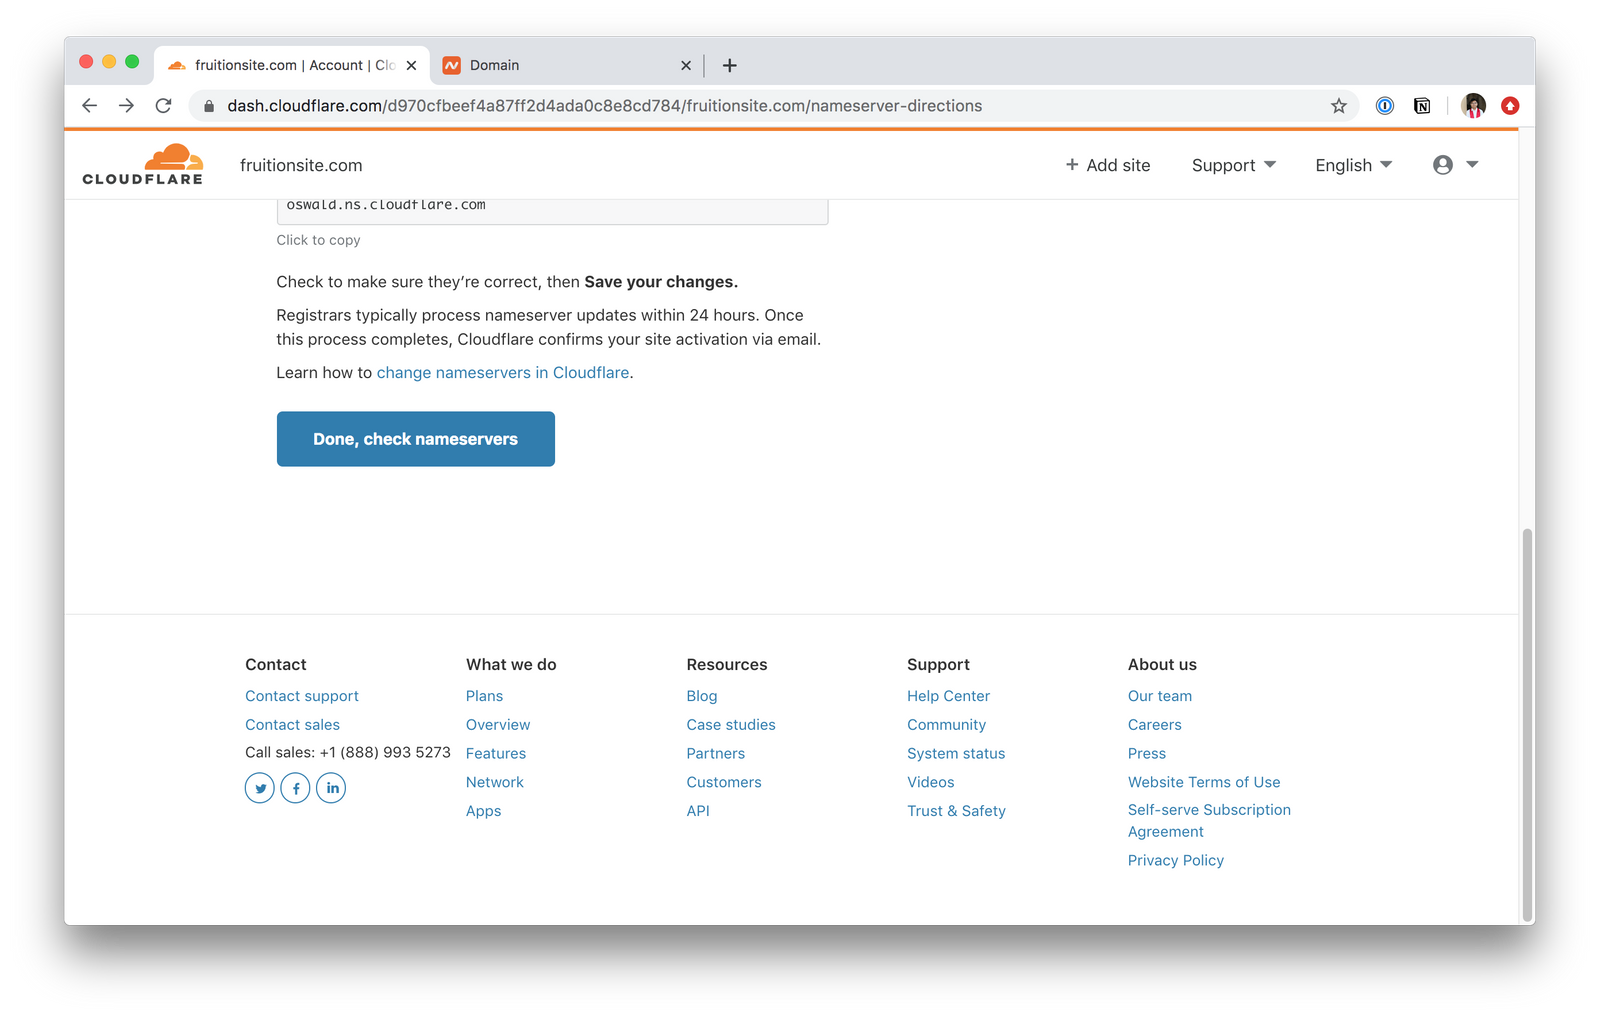
- Wait for a few minutes (consider making a cup of tea), then click Done, check nameservers.
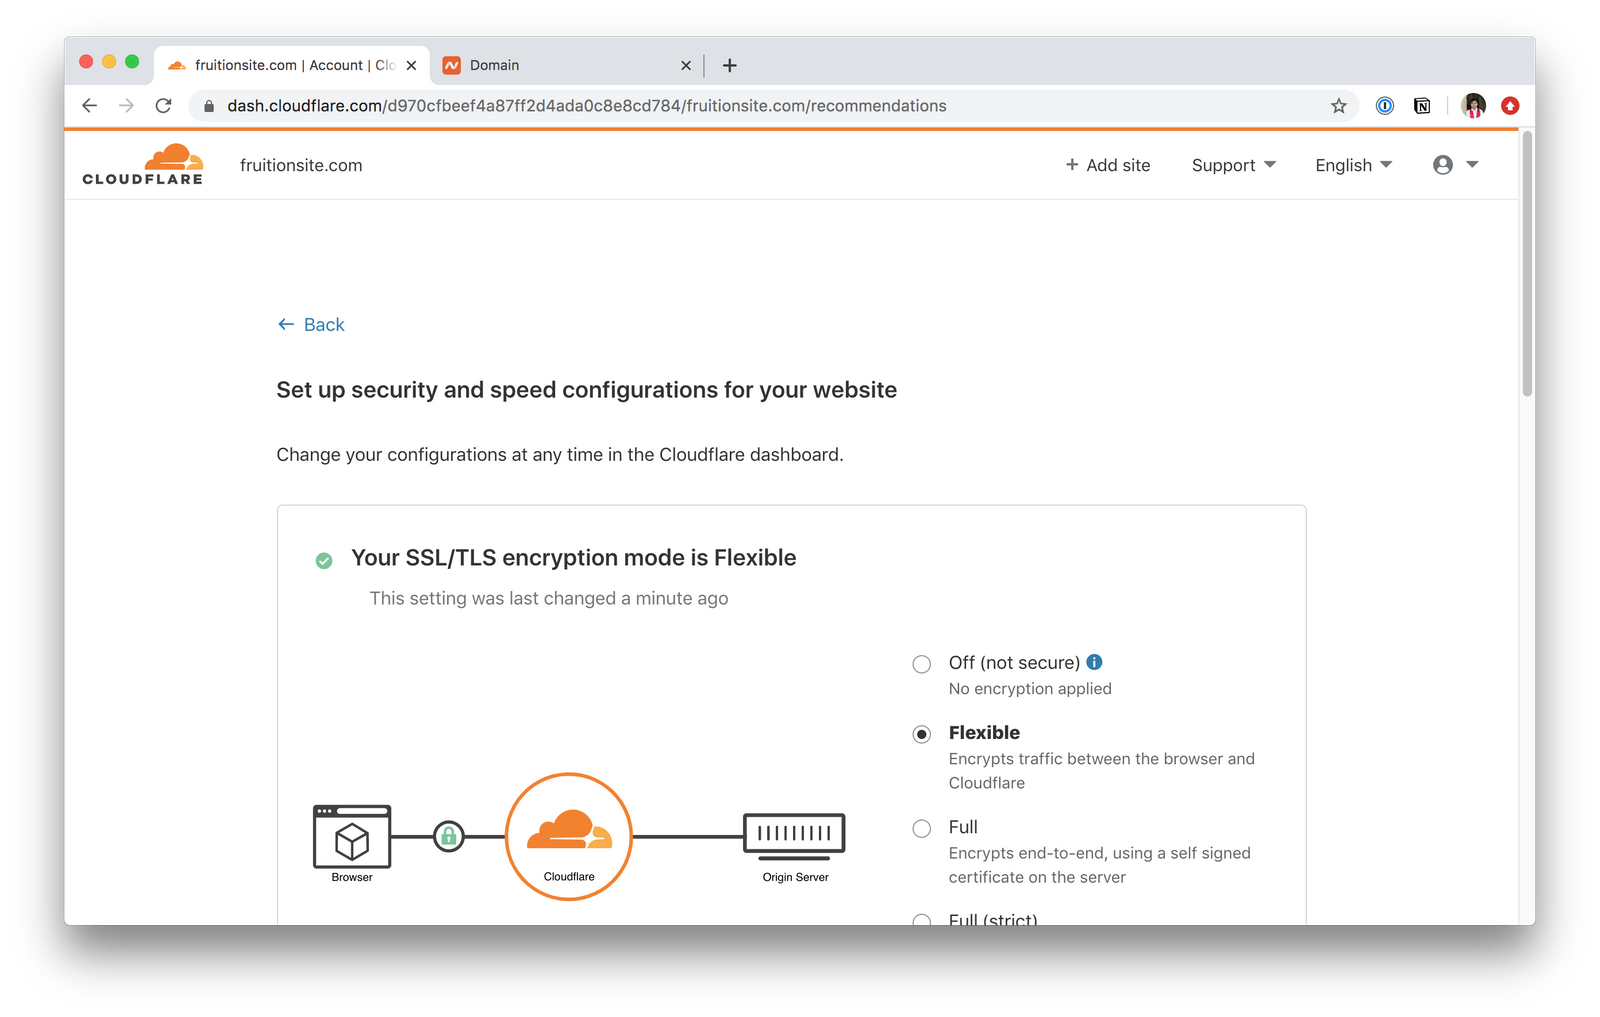
- Select Flexible SSL/TLS encryption mode
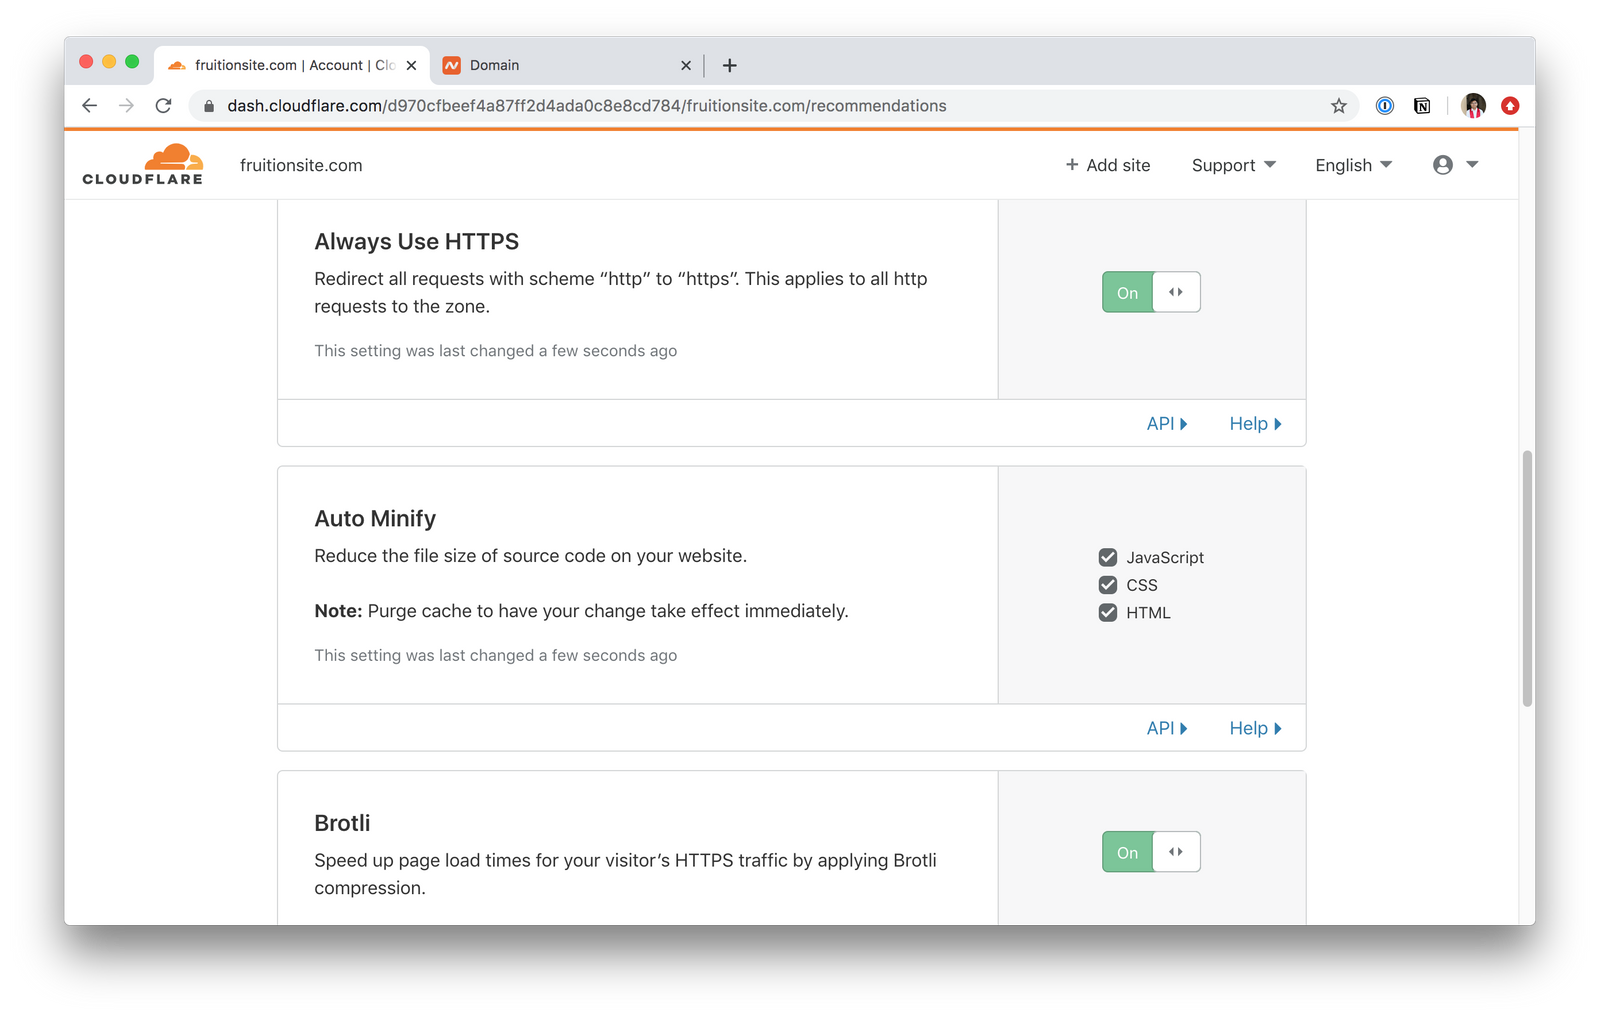
- Turn on Always Use HTTPS, Auto Minify, and Brotli (all 3 optional but recommended)
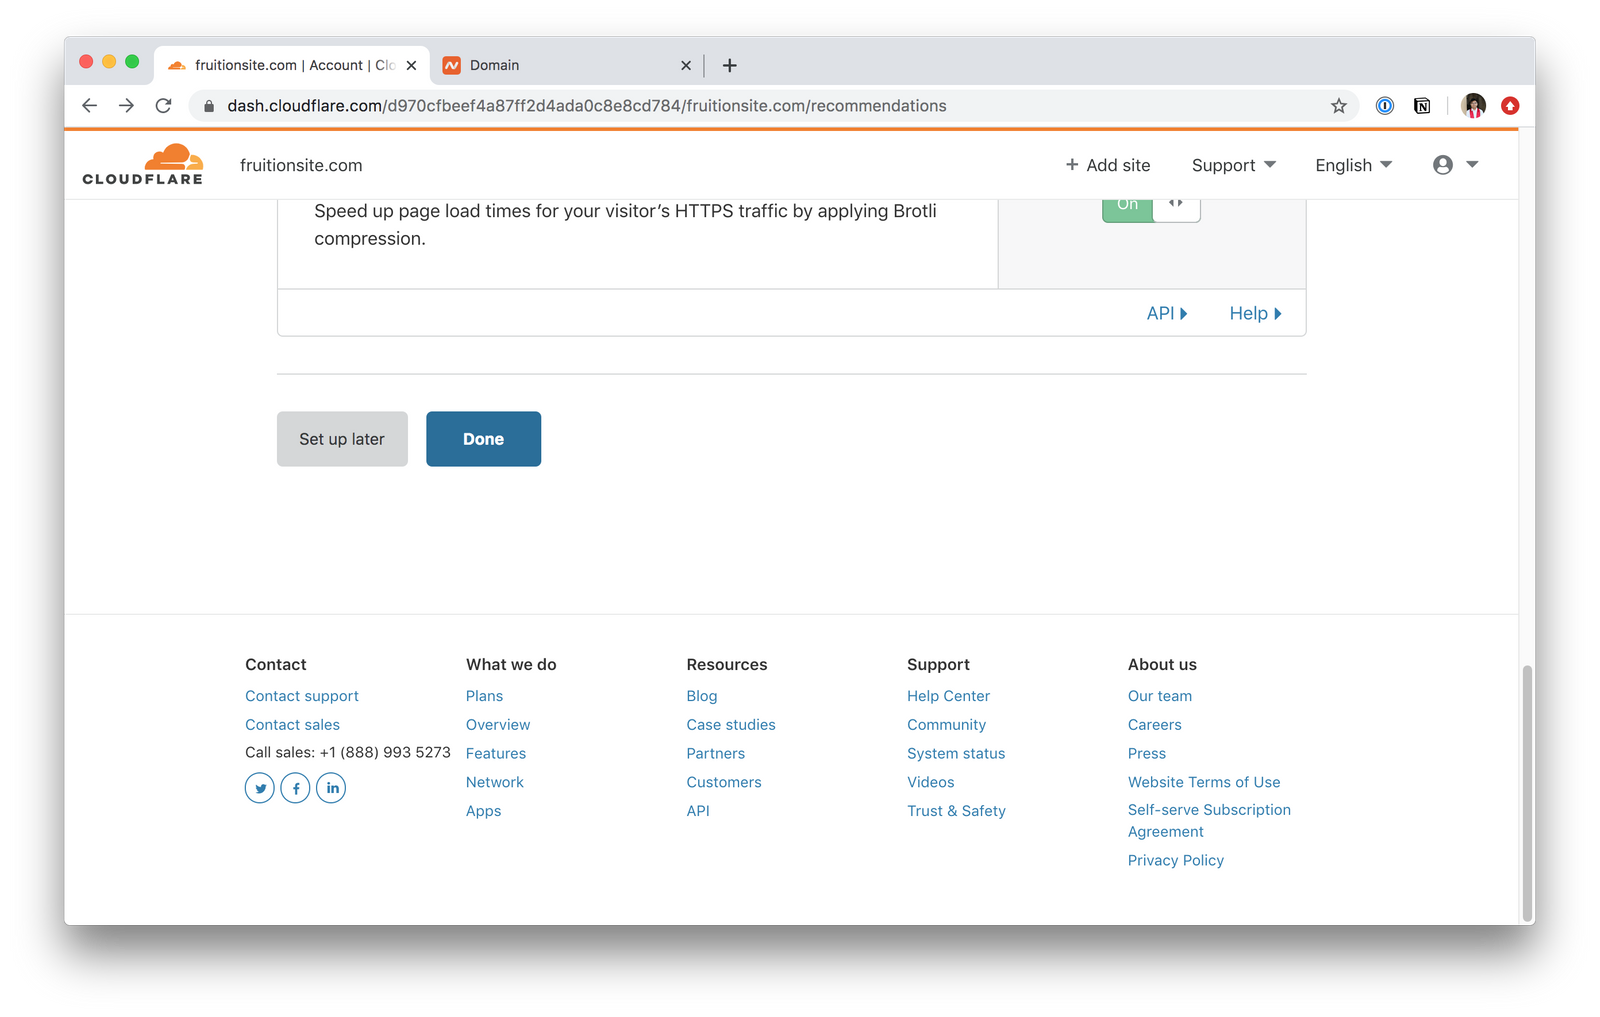
- Select Done
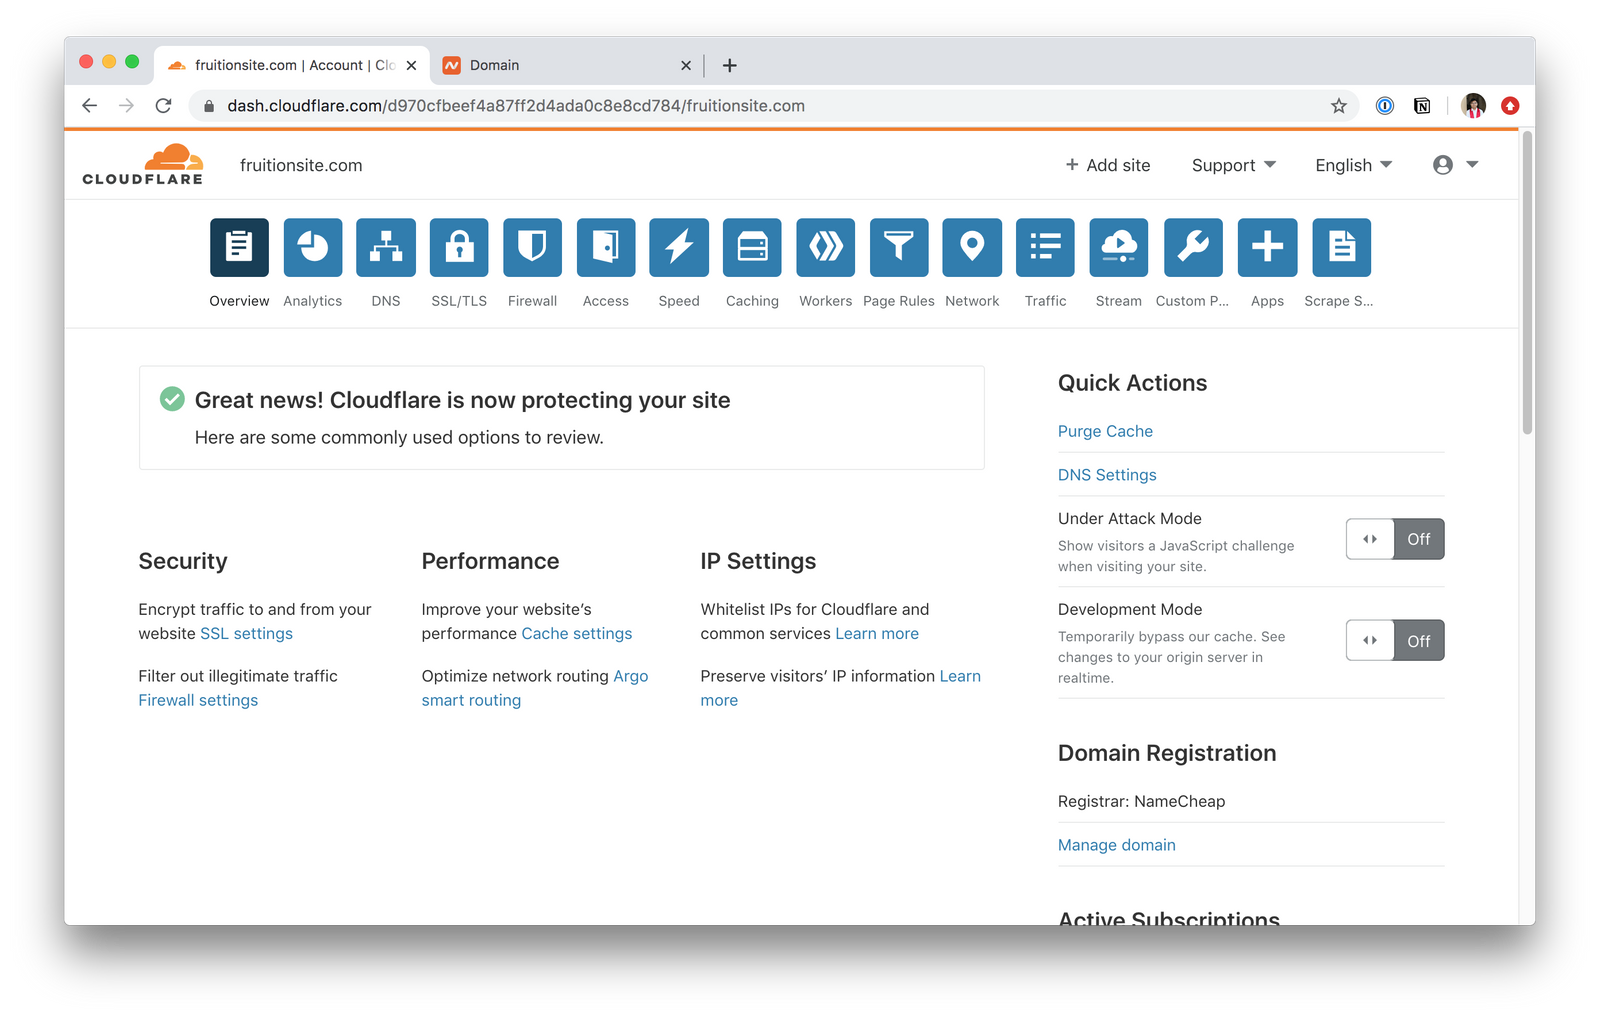
- You should see this screen. Sometimes it can take a little longer for Cloudflare to detect that you've changed nameservers. If that's the case, you might have to wait up to 45 minutes. Keep using the Re-check your site option, and refresh the page, until you see the 'Great news!' message.
Step 2: Set up a Cloudflare Worker
So now Cloudflare is the boss of your domain.
Cloudflare will also have moved over any DNS records you were using with your domain so that any email setup etc. is still working.
(Note: the ownership of your domain is still with your domain manager. You'll still have to pay them a monthly or yearly subscription to keep owning your domain. But everything else is now managed through Cloudflare.)
Now what we're going to do is add a little bit of code called a Worker, which will live at our site and tell Cloudflare to show the content from your Roam blog instead.
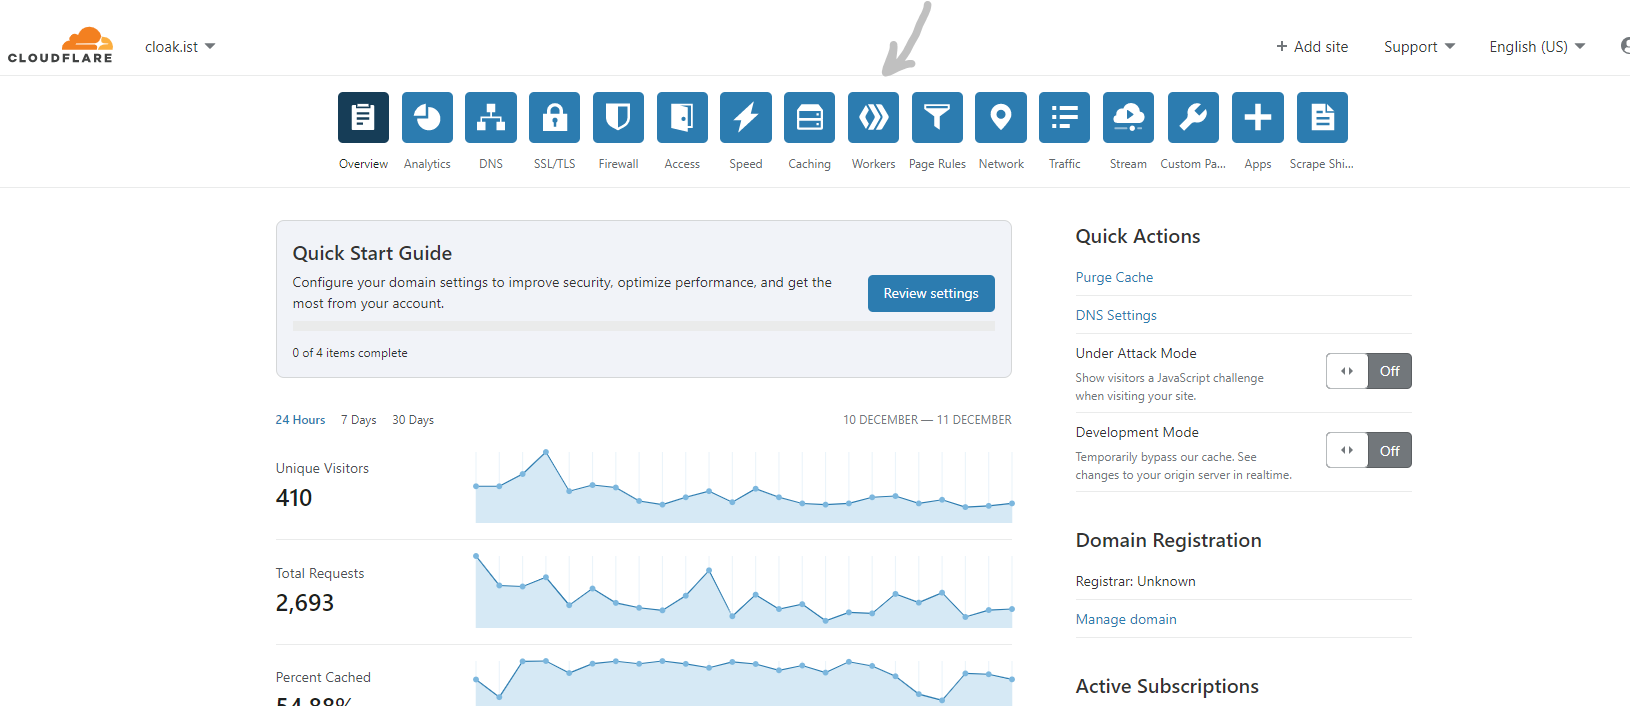
- Click on Workers in the top menu of Cloudflare:
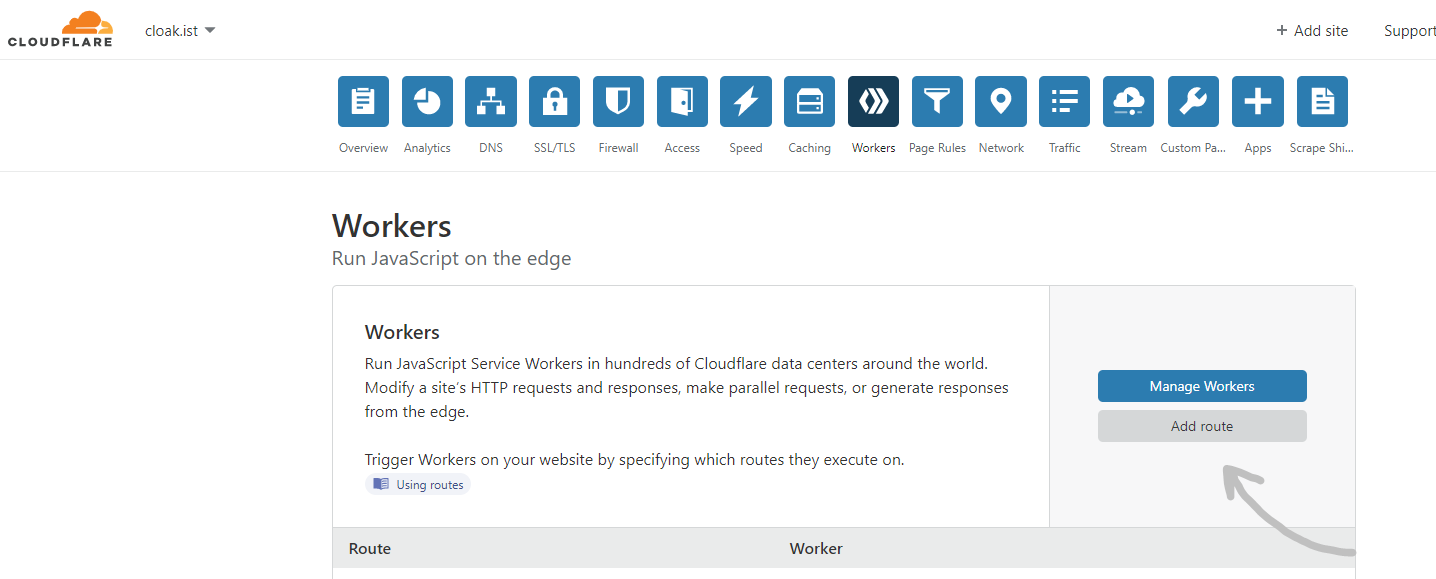
- Add Route
- Enter
yoursite.com/*(but change this to your site!). If you want to use a subdomain, entersubdomain.yoursite.com/*instead
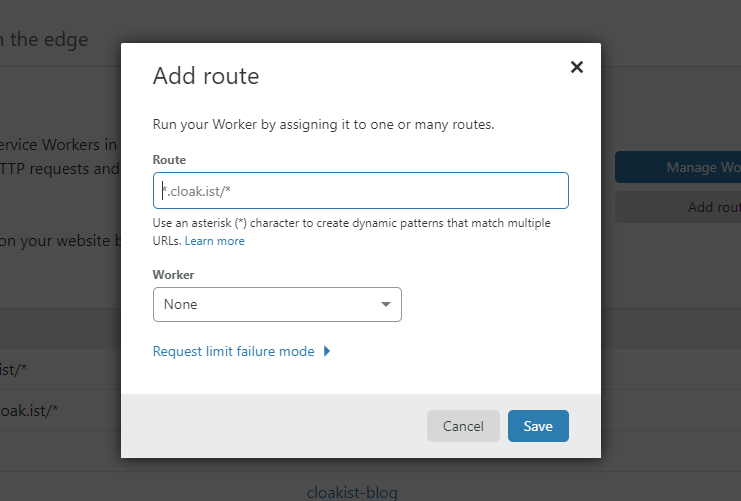
- Hit Save
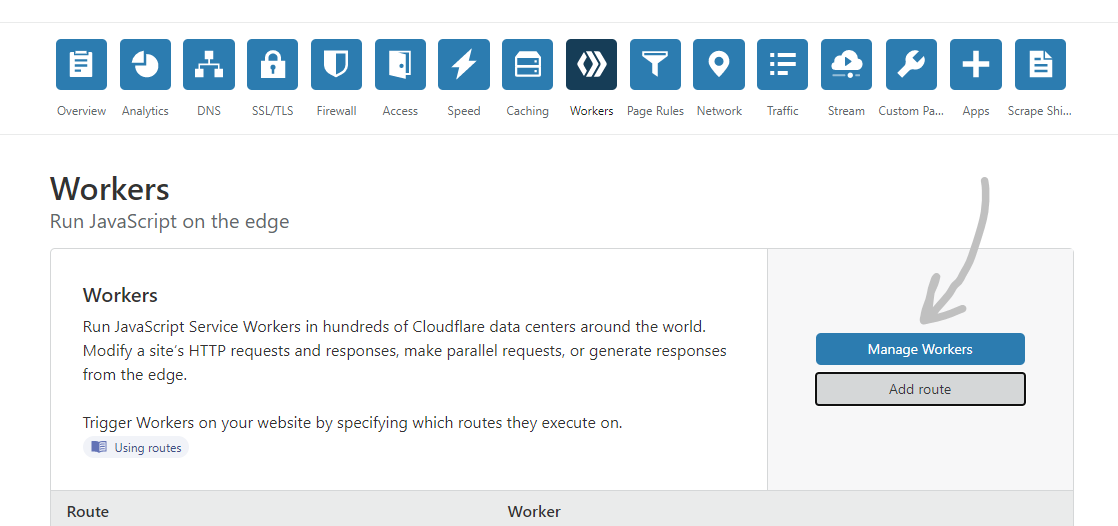
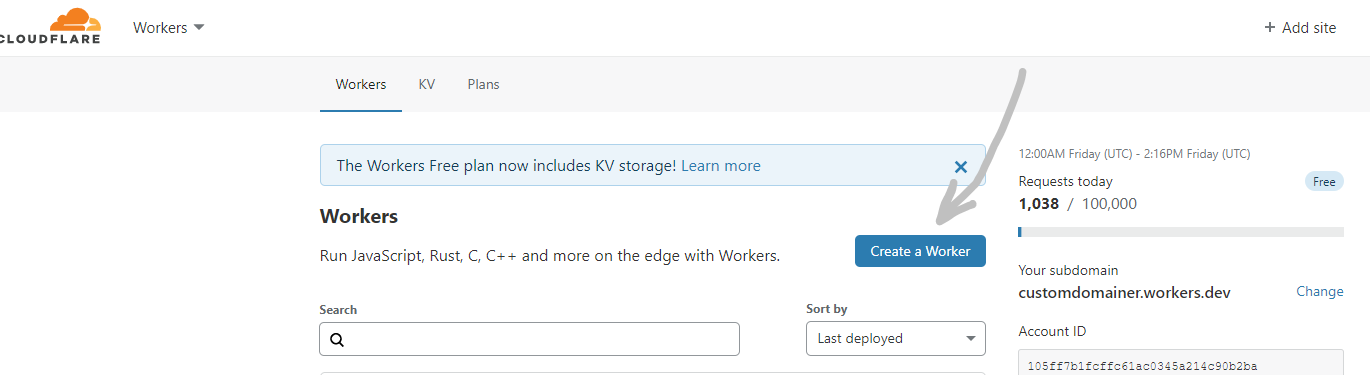
- Manage Workers
- Create a Worker
- Change the name of the Worker (marked with A on the screenshot) to something sensible like
yoursite-roam
- At B, select everything and delete
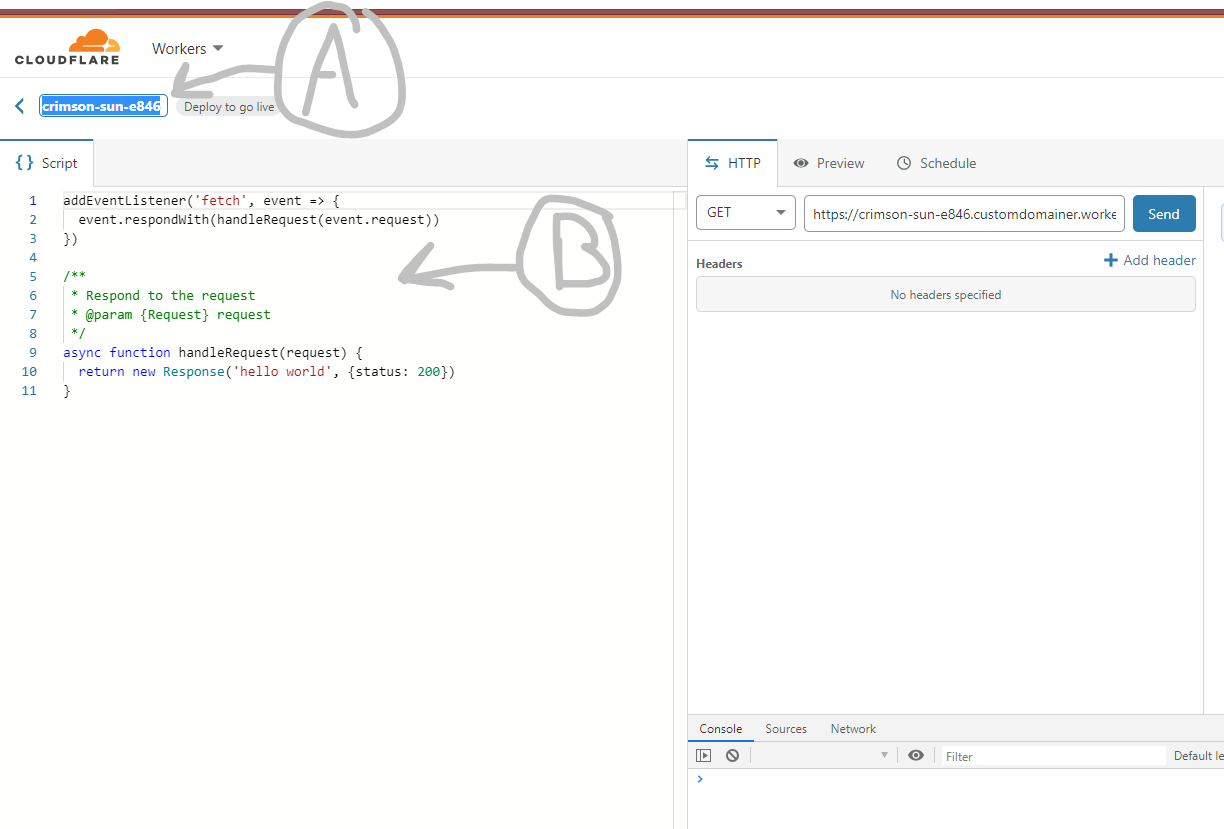
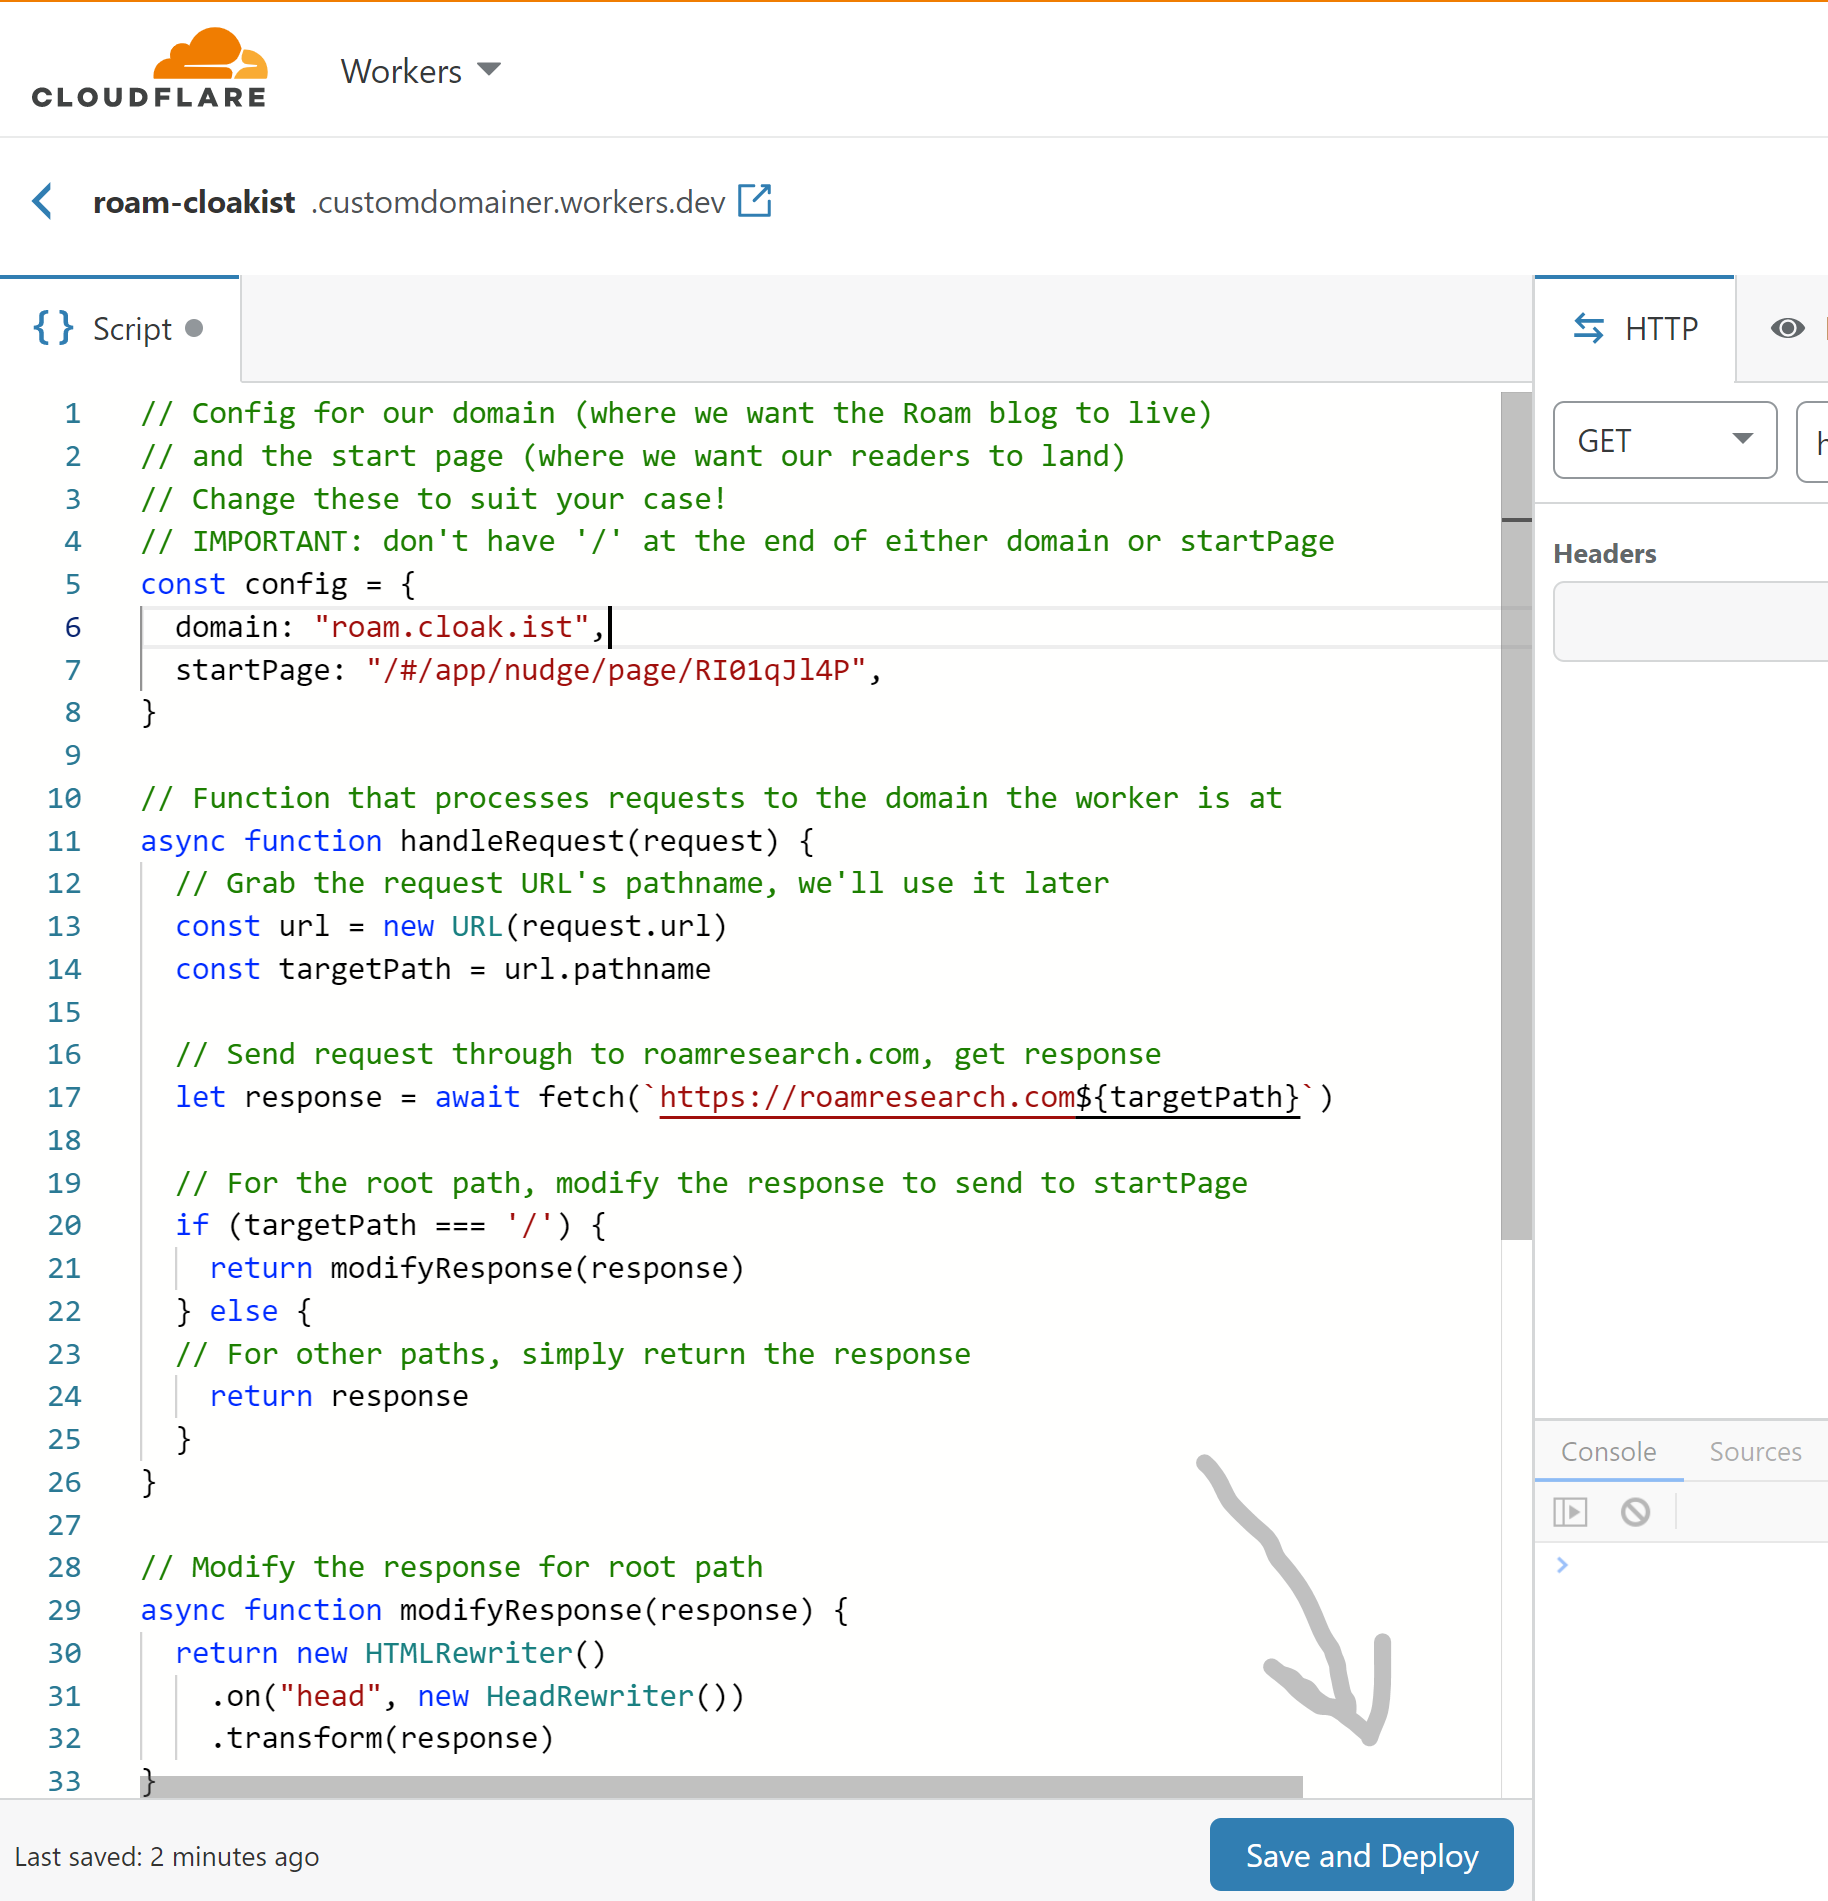
- Now paste in the custom script I've written for this exact purpose:
// Config for our domain (where we want the Roam blog to live)
// and the start page (where we want our readers to land)
// Change these to suit your case!
// IMPORTANT: don't have '/' at the end of either domain or startPage
const config = {
  domain: "roam.cloak.ist",
  startPage: "/#/app/nudge/page/RI01qJl4P",
}

// Function that processes requests to the domain the worker is at
async function handleRequest(request) {
  // Grab the request URL's pathname, we'll use it later
  const url = new URL(request.url)
  const targetPath = url.pathname

  // Send request through to roamresearch.com, get response
  let response = await fetch(`https://roamresearch.com${targetPath}`)

  // For the root path, modify the response to send to startPage
  if (targetPath === '/') {
    return modifyResponse(response)
  } else {
  // For other paths, simply return the response
    return response
  }
}

// Modify the response for root path
async function modifyResponse(response) {
  return new HTMLRewriter()
    .on("head", new HeadRewriter())
    .transform(response)
}

// Change the head of the HTML document
class HeadRewriter {
  element(element) {
    element.prepend(
      `<script>
        if (window.location.hash === "" && window.location.host === "${config.domain}") {
          history.pushState(history.state, "", "${config.startPage}");
        }
      </script>`,
      {
        html: true,
      }
    )
  }
}

// Listen for requests
addEventListener("fetch", (event) => {
  event.respondWith(handleRequest(event.request))
})
(Improvements to this script are welcome! If you make one, I'm happy to update this.)
- Once you've done that, you're going to need to change 2 things in the script, on lines 6 and 7
- Replace
roam.cloak.istwithyoursite.com
- Replace
/#/app/nudge/page/RI01qJl4Pwith the path of the page you want your readers to land on
- ⚠️ Make sure you don't put a
/at the end of either of these! The format should be exactly as it is here
- Hit Save and Deploy
- Now, go back to this Workers page
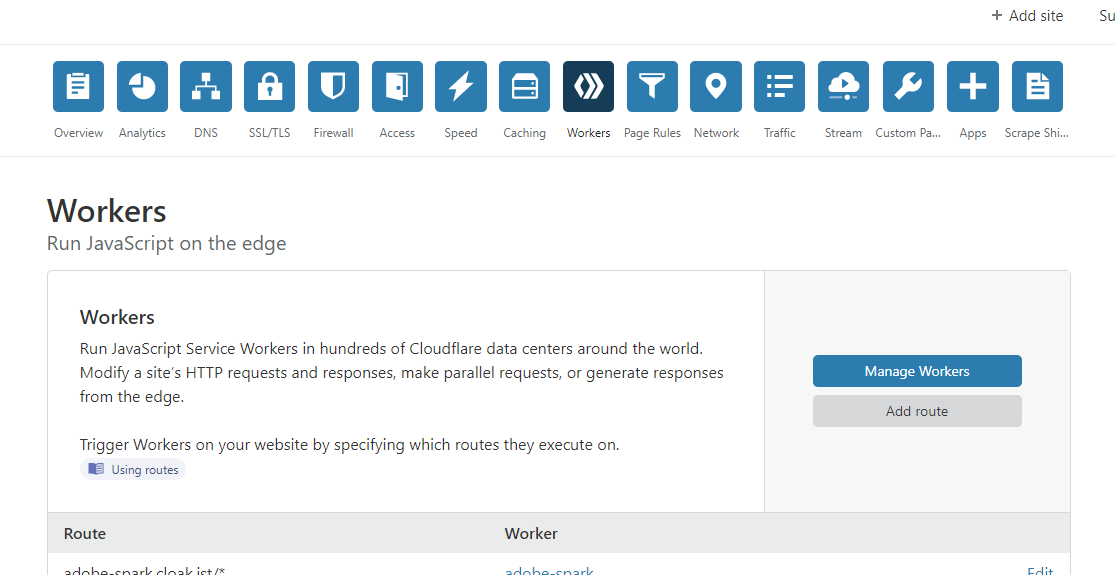
- Find the Route that you made earlier and click 'Edit'
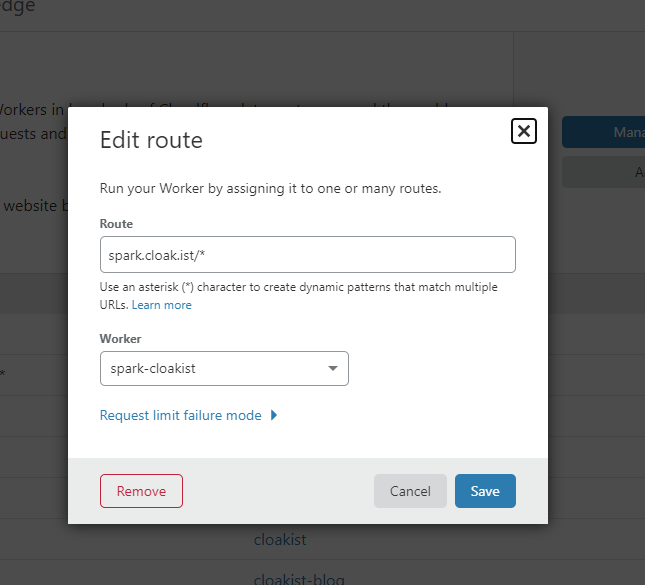
- In the Workers dropdown, select the Worker you just created and hit Save
Step 3: Test it!
This should be all you need to do. Now, go to
yoursite.com (or subdomain.yoursite.com if that's what you're using instead) and see if it's working.If it's not, go back through the steps here and make sure you did all of them correctly. In particular, make sure you replaced the right parts of the Worker script, and that you didn't include anything like
https:// before the link or / after.And if that's still not working, feel free to contact me via the live chat in the corner of this site, or Twitter!
Note: unfortunately there's a concrete limitation to this method, which is that your URLs will be the same as they are on
roamresearch.com, except with that domain replaced with your own. I still haven't found a way around this.The hosted option with Cloakist
If you'd rather not...
- Move your domain over to Cloudflare
- Have to do this set up yourself
- Have to worry about changing any code in future in case this breaks
...you can use Cloakist to do this instead, for $10/m.
And for $25/m we offer a Pro version, where you can:
- Customize your link previews
- Add live chat
- Add any custom CSS/JS that you need
Thanks for reading!
_circle.png)