
Table of Contents
- Before we get started
- Step 1: create a DigitalOcean 1-Click Ghost Droplet
- Step 2: point a subdomain at your droplet's IP
- Step 3: drink some tea
- Step 4: set up Ghost
- Step 5: put your blog at /blog
- Step 6: set up a Cloudflare worker
- Step 7: test it out (and fix SSL if necessary)
- Step 8 (optional): Redirect www to the root
- Step 9 (optional): Restrict access to the subdomain blog
- That's it!
Excerpt
I wanted to start blogging using Ghost. But for SEO reasons, I wanted to put my new blog at cloak.ist/blog, instead of either a completely different domain, or a subdomain like blog.cloak.ist.
STATUS
Slug
how-to-put-a-ghost-blog-at-a-subdirectory-using-cloudflare-workers
Last Updated: 17-Feb-2021
Things have changed slightly on Cloudflare, but this post will sill give you a good starting point.
Last week, I had a problem.
I wanted to start blogging using Ghost. But for SEO reasons, I wanted to put my new blog at cloak.ist/blog, instead of either a completely different domain, or a subdomain like blog.cloak.ist.
That's because I want to build up SEO value for my principal domain, cloak.ist. Google sees subdomains as being a whole other thing. So it's muuuuch better to use yoursite.com/blog if you can.
I spent 3 days figuring out how to set up Ghost at cloak.ist/blog. It was pretty painful. So I've decided to celebrate this blog finally existing by writing a guide to how I set it up like this.
I hope it helps you out!
Before we get started
- You need to own a domain and be using Cloudflare to manage its DNS
- You need to be able to buy a $5/month droplet on DigitalOcean
Step 1: create a DigitalOcean 1-Click Ghost Droplet
Ghost has a hosted option which you can pay for. But I'm going cheap – and also I'm pretty sure, from reading a few things online, that their hosted option won't work with this guide.
So head on over to DigitalOcean and set up a new droplet with their 1-click option. Choose the $5/month droplet.
Once the droplet is set up, don't go and do anything in it just yet.
Just make a note of the droplet's
ipv4 address.Step 2: point a subdomain at your droplet's IP
You need to set Ghost up at a subdomain at your domain, like blog.yoursite.com.
This is so that we can later tell yoursite.com/blog to get all content from that subdomain. But don't worry, we'll also have the option of telling Cloudflare to restrict access to that subdomain to you and Cloudflare, so that you don't have a competing location for your blog living out there.
So go to Cloudflare and create a new A record, with
Name set to whatever you want the subdomain to be (e.g. Name will be blog if you want to use blog.yoursite.com), and IPv4 address set to the droplet's IP that you have noted.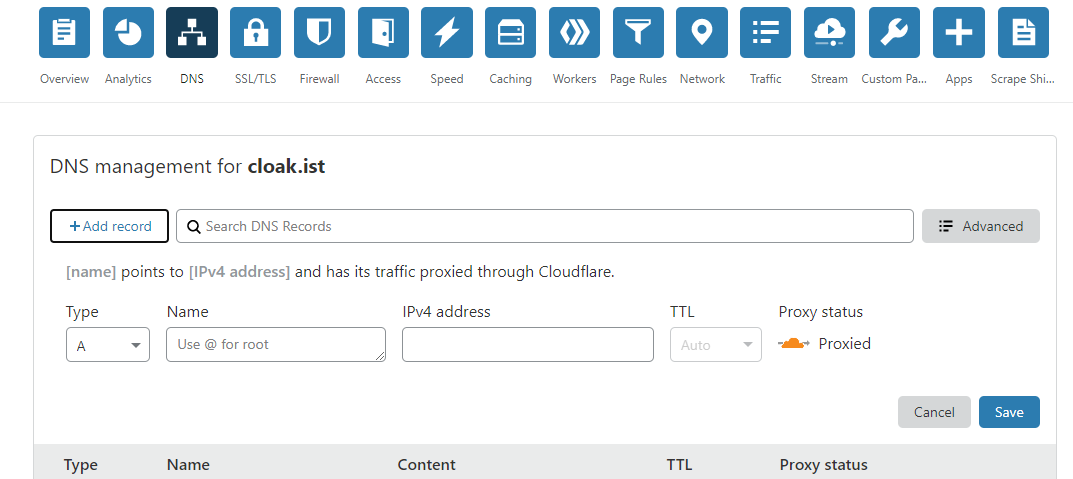
VERY IMPORTANT: Click the orange cloud to change it from
Proxied to DNS Only! This caused me a lot of pain.Step 3: drink some tea
The next step will be to go back to your droplet and set up Ghost on it. But if your subdomain hasn't propagated yet (in other words, if the internet hasn't yet realised that you added the A record from the previous step), the set up will fail.
DNS should propagate pretty fast, but please, please:
- Have a little break to give DNS time to propagate, hence the tea. I recommend chamomile.
- On returning from your delicious tea session, check DNS with a service like this before going onto the next step to make sure that your subdomain is pointed at your droplet IP.
If you left the orange cloud enabled in the previous step, it's very likely that your Ghost set up will fail and you'll see Cloudflare IP addresses when you do the DNS check.
(Not doing this step properly meant that I went into a frenzy of destroying and then remaking droplets. I went through around 5 of them before I got it right.)
Step 4: set up Ghost
Use this guide to set up Ghost on your droplet:

When you're asked for the URL of your Ghost droplet, enter:
https://yoursubdomain.yoursite.comAll of the rest of the set up should be straightforward – use the standard options throughout.
If you get an error, it could be that your DNS didn't propagate yet so Ghost was unable to issue an SSL certificate for your subdomain. I'd recommend going back to Step 1 and starting again if that happens – alternatively, if your error looks different, have a google around to see if you can fix it. Quite a lot of people seem to have had issues with DigitalOcean's '1-click' Ghost installation...
At this point, you should also check that your blog is live at
https://yoursubdomain.yoursite.com.Keep your SSH session open!
Step 5: put your blog at /blog
We're going to put your blog at a subdirectory on the subdomain now, before we move it to living at your root domain instead of the subdomain.
Run the following commands while you're still in your SSH session:
sudo -i -u ghost-mgr

// This will let you configure Ghost

cd /var/www/ghost

// This will move you into the Ghost installation folder to make changes

ghost config url https://yoursubdirectory.yoursite.com/blog

// This will change the URL of your Ghost blog. You can obviously change /blog to whatever you want

ghost restart

// IMPORTANT! This will restart your Ghost instance so that the URL change comes into effect.123456789101112131415
At this point, check that
https://yoursubdirectory.yoursite.com/blog is working. If you see a 404, you probably need to run ghost restart.Also, you could now set yourself up as the admin of the blog by going to
https://yoursubdirectory.yoursite.com/blog/ghost. This is not a necessary step though – you can do it later.Note: you will always have to manage your Ghost blog at yoursubdirectory.yoursite.com/blog/ghost! Trying to manage your content from yoursite.com/blog/ghost will not work.
Step 6: set up a Cloudflare worker
We're going to set up a Cloudflare worker at your subdirectory https://yoursite.com/blog which is going to act as a reverse proxy – so it'll basically serve your Ghost blog at that URL.
- Go to Cloudflare -> Workers
- 'Add Route' ->
yoursite.com/blog*
- 'Manage Workers'
- 'Create a Worker'
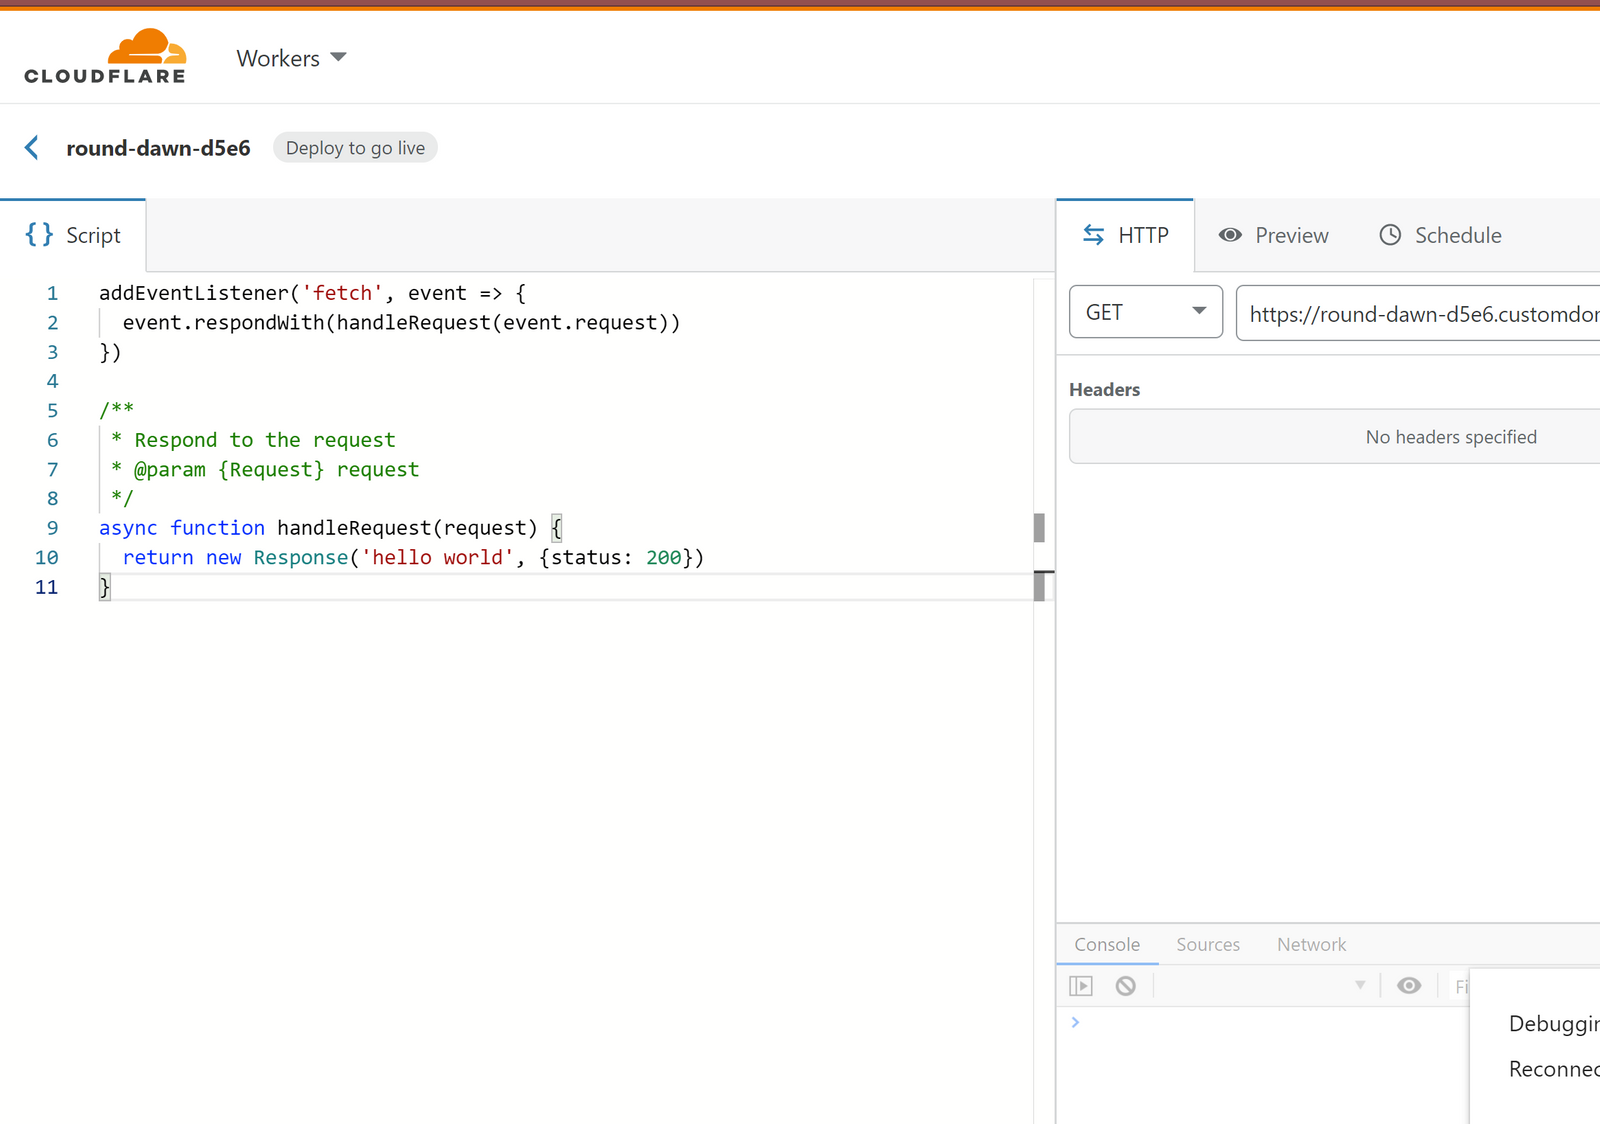
At this stage, you're going to want to replace everything in the code editor with the following script, after changing the
config object to reflect your set up:// Config for our subdomain (where the Ghost blog currently lives)
// and our root domain (where we want it to live)
// and our blogPath (the subdirectory we want it at)
// Change these to suit your case!
const config = {
subdomain: "yoursubdirectory.yourdomain.com",
root: "yourdomain.com",
blogPath: "blog",
}
// Function that processes requests to the URL the worker is at
asyncfunctionhandleRequest(request) {
// Grab the request URL's pathname, we'll use it later
const url =new URL(request.url)
const targetPath = url.pathname
// Change request URLs to go through to the subdomain
let response =await fetch(`https://${config.subdomain}${targetPath}`)
// Ghost loads assets like JS and CSS from 3 subdirectories
// We don't need to change these requests at all
// So if we're getting stuff from those subdirectories,
// we return the response of the fetch request from above
// immediately.
if (
targetPath.includes('/${config.blogPath}/favicon.png') ||
targetPath.includes('/${config.blogPath}/sitemap.xsl') ||
targetPath.includes(`/${config.blogPath}/assets/`) ||
targetPath.includes(`/${config.blogPath}/public/`) ||
targetPath.includes(`/${config.blogPath}/content/`)
) {
return response
}
// In other cases - which will usually be pages of the
// Ghost blog - we want to find any reference to our subdomain
// and replace it with our root domain.
// This is so that things like our canonical URLs and links are
// set up correctly, so we NEVER see our subdirectory in the code.
// First we get the body of the response from above
let body =await response.text()
// Then we search in the body to replace the subdomain everywhere
// with the root domain.
body = body.split(config.subdomain).join(config.root)
response =new Response(body, response)
return response
}
addEventListener("fetch", (event) => {
event.respondWith(handleRequest(event.request))
})
1234567891011121314151617181920212223242526272829303132333435363738394041424344454647484950515253
I've written comments explaining what this code is doing.
Paste this code in, give the Worker a slightly clearer name – e.g.
yoursite-blog – hit Save and Deploy, and then go back to the main Workers page: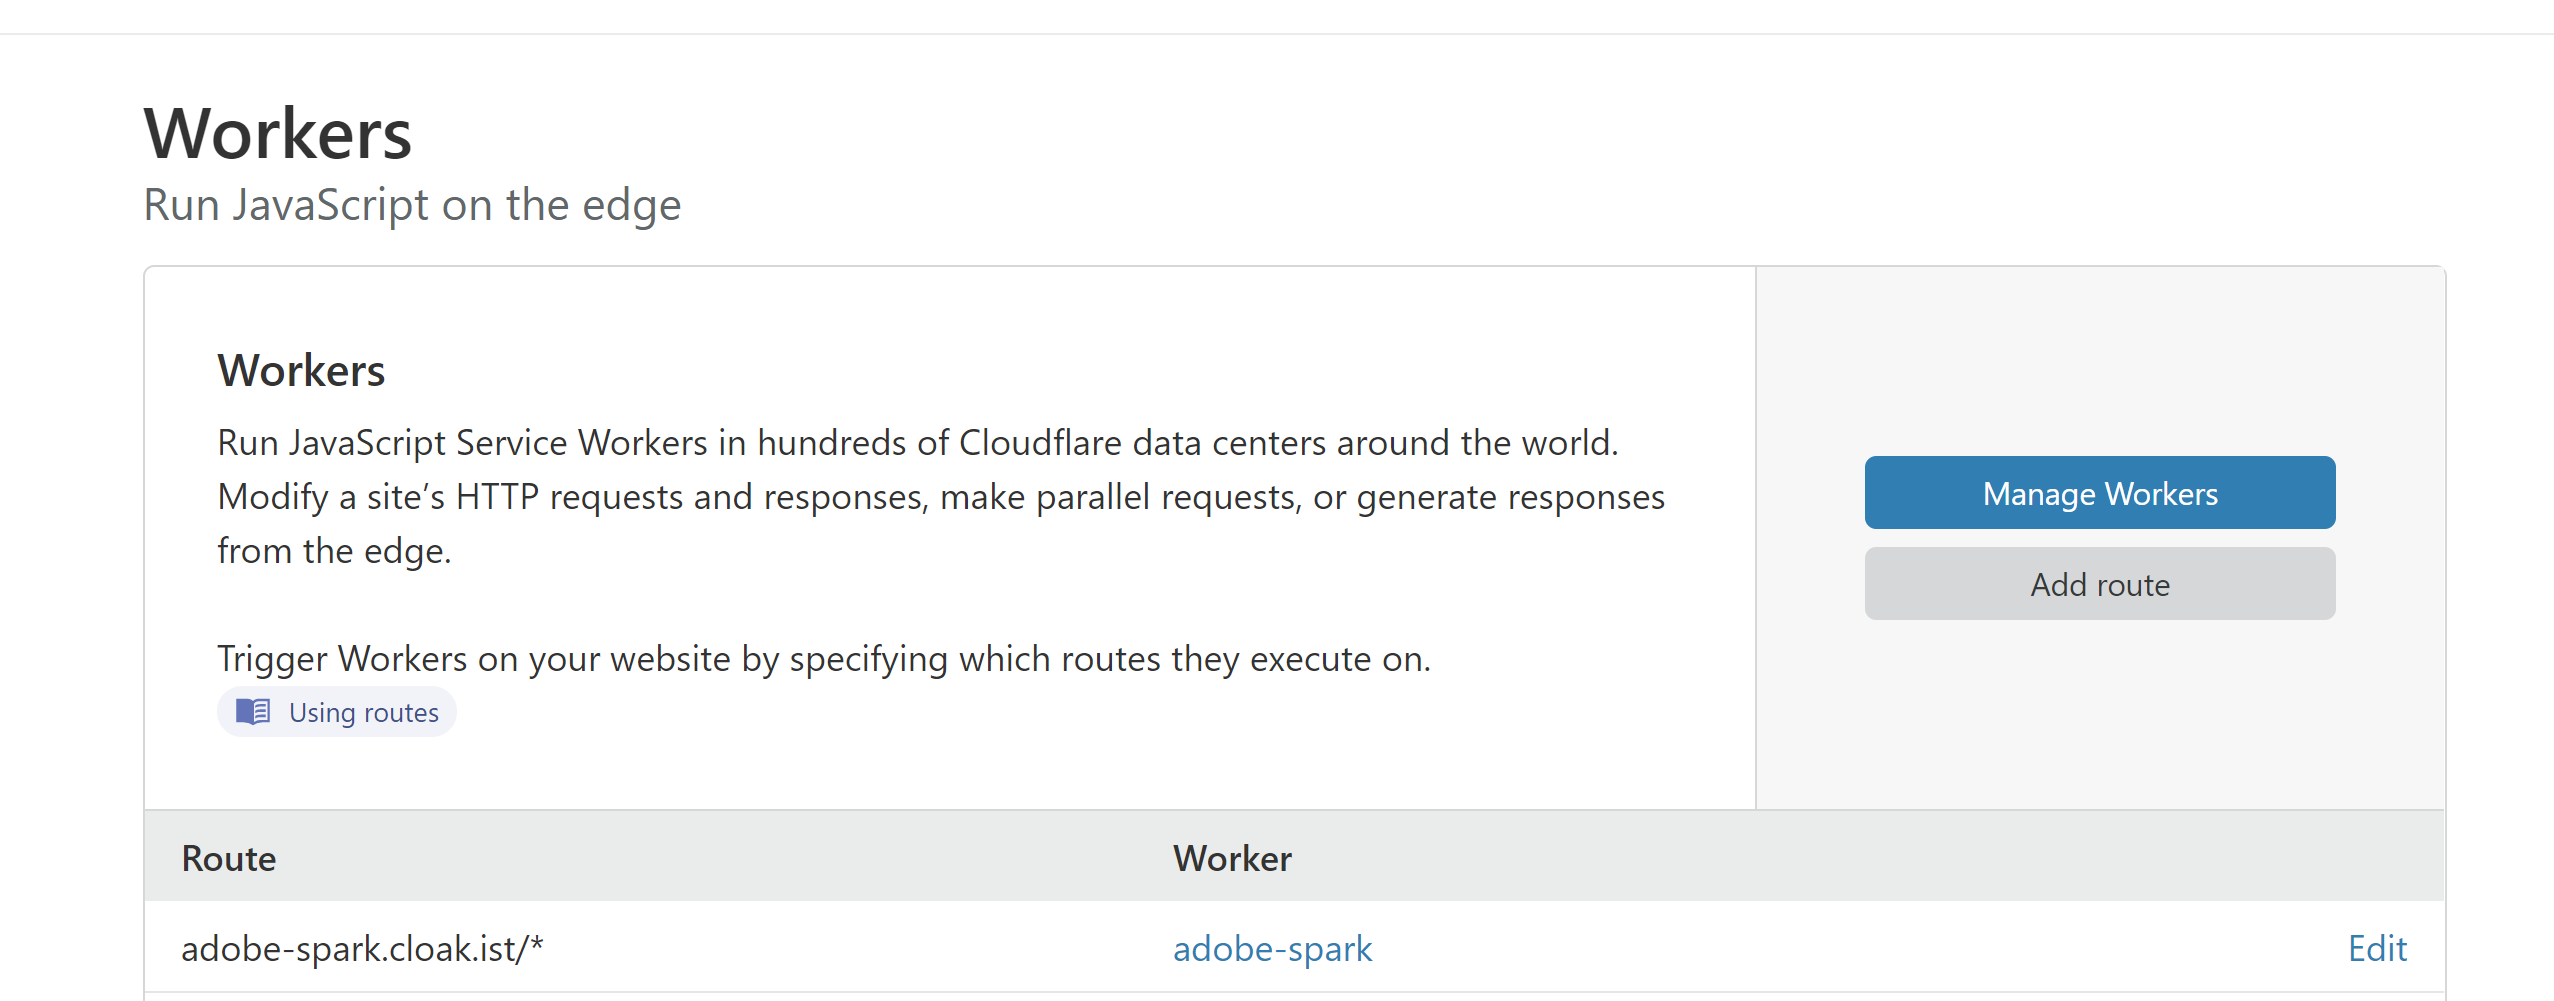
Here, you'll want to hit Edit on the Route you created earlier, and set the Worker on it to the one you just made.
Step 7: test it out (and fix SSL if necessary)
At this point, if all has gone well, you should have a fully working blog at
yoursite.com/blog (or whichever subdirectory you chose). If you don't, check through the instructions to see if there's anything you missed.⚠️ One common issue that stops this set up working is with SSL certificates. To fix this:
- Go to the SSL/TLS menu in your Cloudflare and change mode to Full instead of Flexible
- Note that this could have implications for other apps or sites you are hosting at Cloudflare
- See if it's now working
Step 8 (optional): Redirect www to the root
One thing you might want to do at this stage is make sure that anyone going to
www.yoursite.com always gets redirected to the root, yoursite.com.That's because:
- It's cleaner to only have one of the two of the root and
wwwlive
- Your blog lives at the root, not at the www, so anyone trying to go to www.yoursite.com/blog will currently fail
You should be careful here – it's possible that the set up of your main site already has some kind of configuration that deals with this. But if not, it's probably a good idea to create a Page Rule in Cloudflare that will handle this.
For some reason, my Cloudflare is currently crashing so I can't put in as many screenshots as I'd like to but here's what you do:
- Go to Page Rules for
yoursite.com
- For the URL, enter
www.yoursite.com/*
- Select 'URL forwarding' and 'Permanent - 301 Redirect'
- For the URL to forward to, enter
https://yoursite.com/$1
- (The
$1is to tell Cloudflare to add on whatever the end of the URL was when the user tried to hit thewwwpage.)
Step 9 (optional): Restrict access to the subdomain blog
So to make things cleaner, you might want to do one last thing: use a Cloudflare Firewall rule to make access to yoursubdirectory.yoursite.com impossible for everyone apart from: 1) you (because you're going to need to go there still to use the CMS) 2) Cloudflare Workers.
I feel like this may be a good thing to do for SEO, since otherwise you have a blog with exactly the same content and with competing canonical URLs. (I could be wrong here though – please let me know via the live chat if so!)
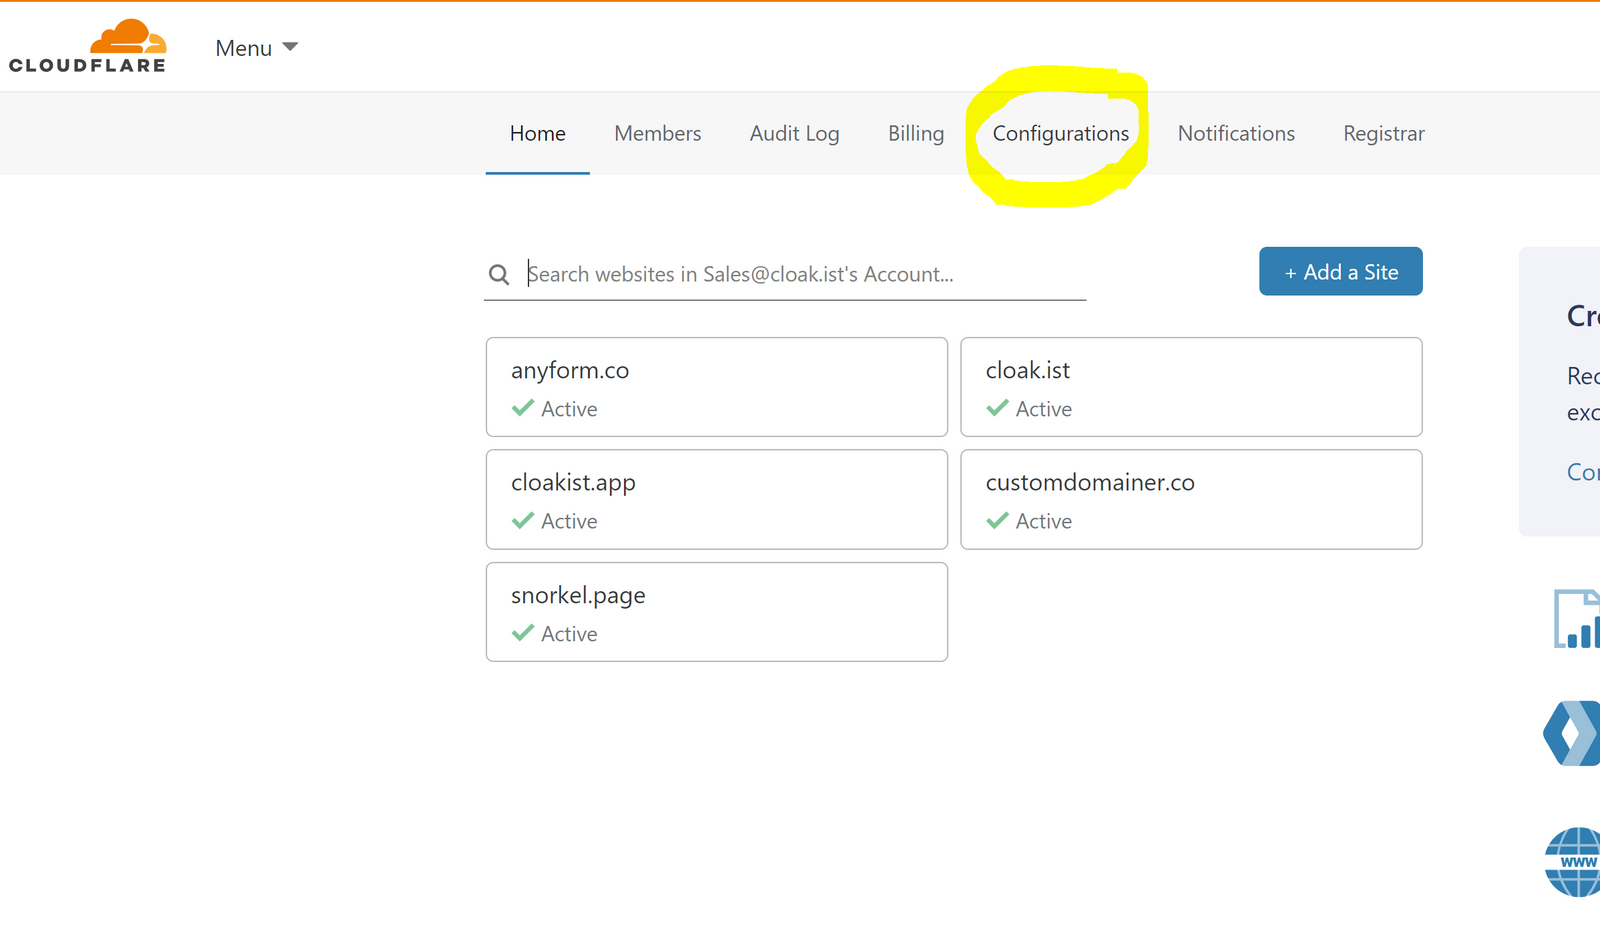
- First, we'll create an IP list for Cloudflare IP addresses
- Go to Configurations at your main Cloudflare menu:
- Select Lists, 'Create new list':
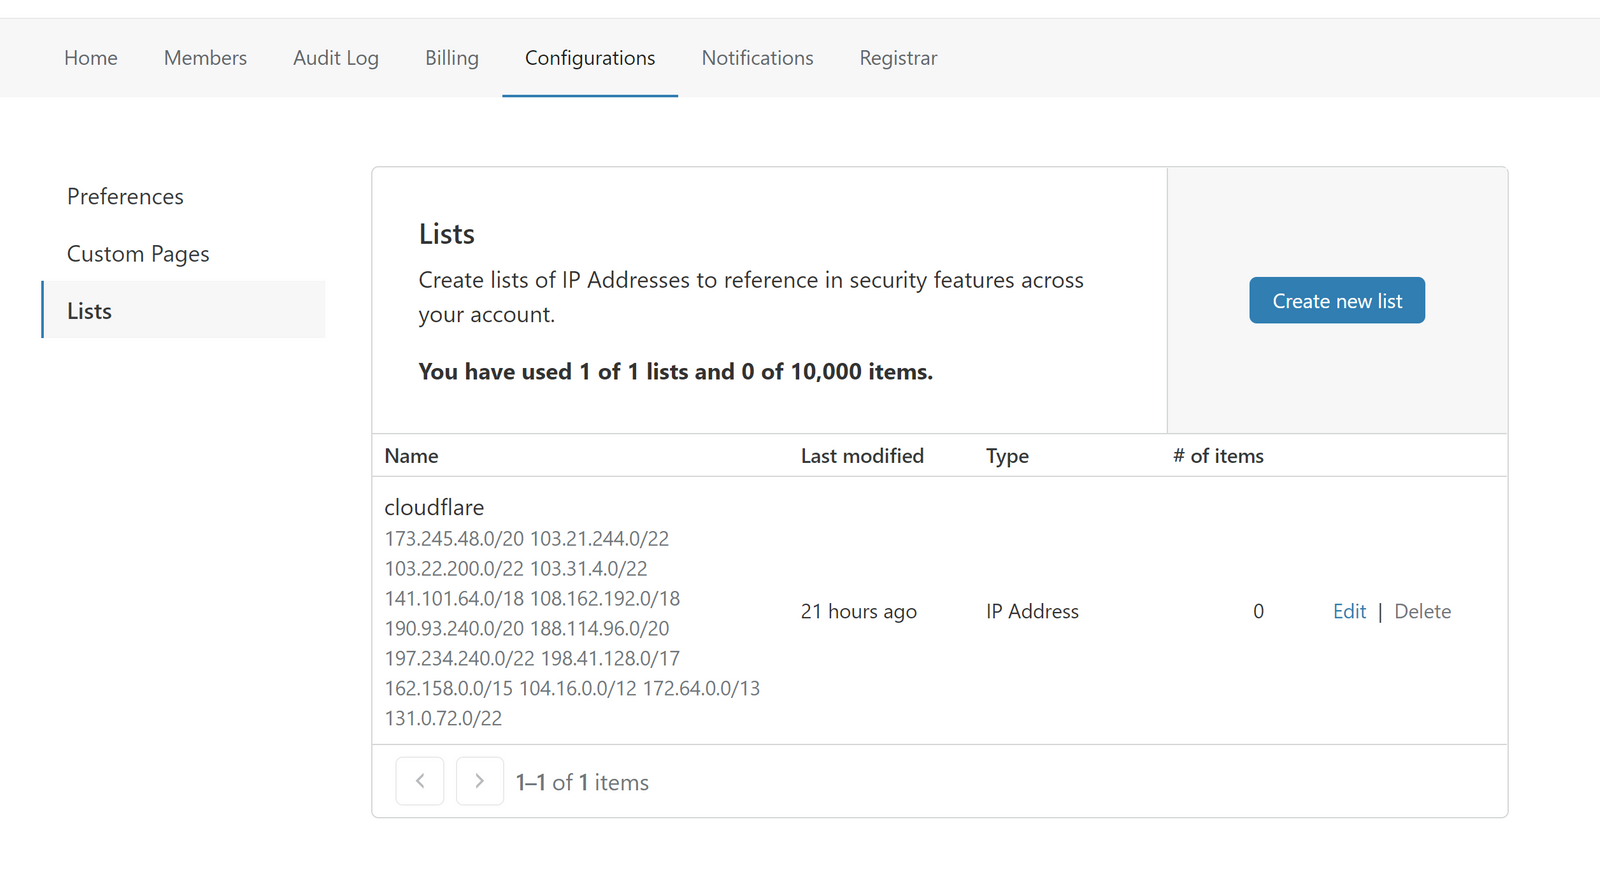
- Paste everything from this list into your new list and hit Save
- Go to your domain from the main Cloudflare menu, then Firewall -> Firewall Rules -> Create a Firewall Rule
- Set your rule up like this:

- My Ghost subdomain is cloak.ist – you'll want to replace this in the URI Full filter.
- You'll want to change the list filter to use your list of Cloudflare IPs.
- Finally, you'll want to use filters like the last 3 to add your own IP addresses. (I have 3 here because I move between different locations a lot.)
- ⚠️ You'll need to do this to ensure you have access to editing the Ghost blog!
That's it!
At this point you should have:
- A working blog at yoursite.com/blog...
- ...which has correct links to itself, and correct canonical URLs at your root domain (yoursite.com)
- A subdomain where you can go to manage your blog, which is only accessible to you and Cloudflare.
- (Note: you will always have to manage your Ghost blog at yoursubdirectory.yoursite.com/blog/ghost! Trying to manage your content from yoursite.com/blog/ghost will not work.)
Hopefully this will be much better for your SEO than if you'd had to put your Ghost blog at the subdomain!
If you have any questions at all, feel free to tweet @cloakist or get in touch via the live chat.
.png)
_circle.png)